
Automotive photography has never been as simple as photographing cars; for those behind the lens, it’s about capturing the romance people have with the lifestyle, freedom, and possibilities a vehicle represents. Throughout this article, I’ll share my approach to automotive photography, from my go-to gear to my best practices. Whether you’re new to shooting cars or seeking a fresh perspective, my goal is to help you capture the excitement and passion you felt the first time you rode in a cool car or raced your dream car in an arcade.
For those of you new here, I’m Willis! I’m an Australian content creator (@willis.newman) and photographer, specialising in automotive, travel and product visuals. Having an array of experience travelling for automotive shoots and working with brands such as Porsche, I look to pass on what I’ve learnt in our detailed discussion below.
Let’s Start with the Essentials - Gear!
Recommended cameras for car photography
The beauty of this field is that there’s no barrier to entry, whether you shoot on the Alpha 6700 or the Alpha 1 II the quality of your work depends on the creative direction behind the camera. However, with that said, there are camera’s I’d recommend to better your workflow, increase your efficiency and improve your delivery. Especially if you create professionally or are looking to do so!
When it comes to gear, there’s no one-size-fits-all. That said, I’ve highlighted cameras below which I’ve used that cater to various experience levels - from chasing action shots, working on commercial projects, or shooting for fun.
The Alpha 7 IV is a great all-rounder. It’s got a 33 MP sensor that captures plenty of detail without overwhelming your storage space, making it perfect for beginners or enthusiasts. Plus, its advanced auto-focus is reliable, whether you’re shooting a parked classic or a car on the move. If you prefer something lighter in the hands, the Alpha 7C II is a compact alternative that’s just as capable, with similar image quality and modern features such as AI subject detection/tracking - packed into a smaller body. This is a camera I use a lot overseas and on carry restricted shoots.
For those looking to capture speed, the Alpha 9 III is built so that you won’t miss the shot. It’s lightning-quick, shooting up to 120 fps without any blackout in the viewfinder, making tracking fast-moving cars (think drifting, motorsports) effortless.
And lastly, for photographers focused on capturing every detail - the kind of shots you’d see in editorial work through glossy ads or magazine spreads – or are simply looking to print on larger canvas size - the Alpha 7R V is what I’d recommend with its 61 MP sensor. It’s fantastic for picking up the fine textures of leather interiors, the car’s lines and exterior details, or the intricacies around the engine.
Choosing the right lenses
Let’s cut to the short and sweet; the 70-200 G Master II is my favourite lens. When photographing cars, we look to accentuate the lines and edges the car’s body has, typically giving the car more presence and showing off its design. This translates in photographer terms to compression, the higher the focal length the closer the background appears to the subject, creating a seemingly flat image but with more bokeh and defined shapes (hence the favoured clarity in the car’s bodywork).
Personally, I don’t favour ultra-wide/wide angle lenses when it comes to automotive photography. These are what often distort the subject and create an unrealistic representation of the car. Our eye is meant to see 50-85mm equivalent in focal length. The primary scenario in which I’ll use a wide or ultra-wide will be to showcase a broader environment, the overall interior of a car or by getting experimental/abstract with the shoot direction.
When I’m not using the 70-200 GM II, I’m often using the 24-70 GM II. Another great variable lens offering great flexibility while maintaining a sharp image with that G Master glass!

Useful accessories for car photoshoots
There are 3 accessories I utilise on automotive photoshoots, following on from our chat about lenses, it’s extremely important to attach a Circular Polarising Filter (CPL) onto the front of your lenses. From the bodywork to windows, cars are full of reflections and therefore act like large mirrors. CPL filters are what enable us to cut a large majority of these unwanted reflections out.
Next, an essential tool allowing me to diversify my shot types is a tripod. This is what helps create those long exposures, especially in night photoshoots where you’ll see a light trail surrounding the car. This is the most extreme use-case scenario, however primarily what I’ll use a tripod for is to HDR or Image Stack.
HDR or Image Stack is where you lock off a position and take multiple photos (about 3) at different exposure levels. This will enable you to merge these in post-production and improve the dynamic range of your photo, allowing for more flexibility in the edit. Another purpose for Image Stacking can be for if you’re shooting in a busy environment, taking multiple photos can help you layer mask out unnecessary people or distractions which are moving through frame on location in Photoshop.
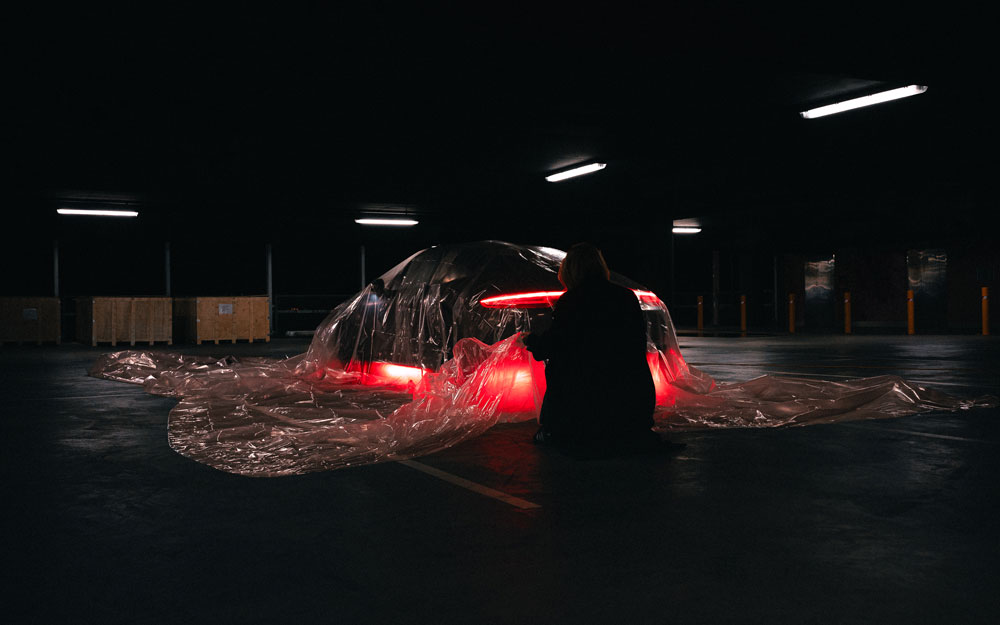
For more of a creative addition, is a light bar. These are particularly useful at night to help in enhancing the mood and overall scene. Previously, I’ve placed these in car interiors as these are often enclosed spaces which trap light and create a unique light display depending on your choice of RGB colour or temperature.
Preparing for a Car Photoshoot!
Before you start snapping away, a little preparation can make all the difference in how your shots turn out. As they say - fail to plan, plan to fail. Here’s how I like to set up:
Cleaning and Detailing the Car
It’s a simple step, but cleaning the car properly is crucial - making sure to wipe off any fingerprints and dust at minimum. A clean car looks more polished, and those little details can make or break the shot. If you’re shooting someone’s car they’ll usually do this, especially if it’s for a brand, however it doesn’t hurt to have your own cloth.
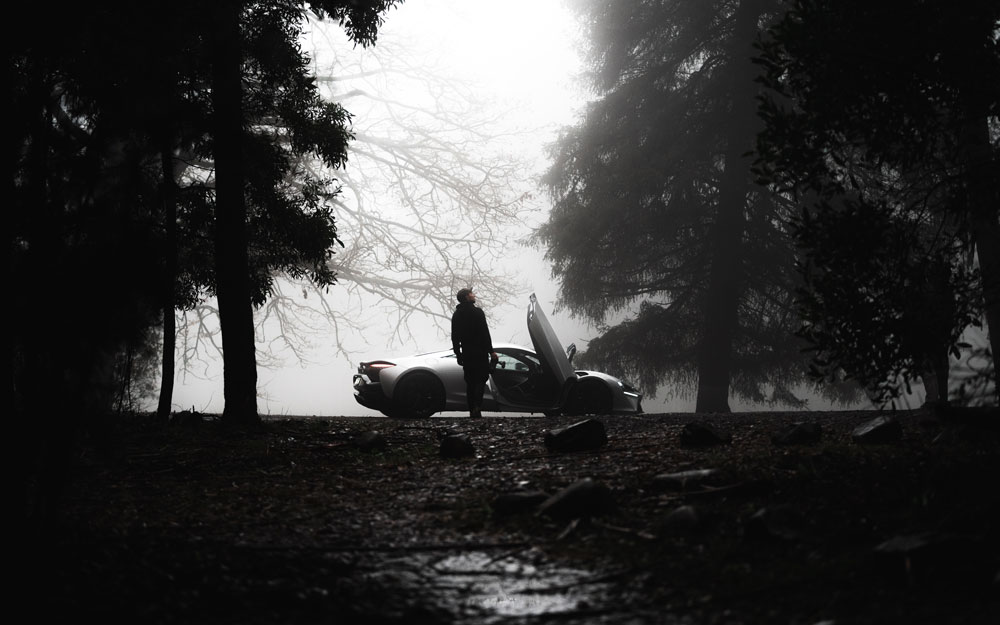
Scouting the Perfect Location
Location is key, and tools like Google Street View are super helpful for finding new spots. I can’t tell you how many hours I’ve spent navigating cities looking for locations. Instagram, Pinterest, and Behance are also great resources for discovering inspiration and new locations too. What I usually look for are places with clean, minimal backgrounds. Too many distractions in the background can take the focus off the car.
Planning Shots Based on Weather and Lighting
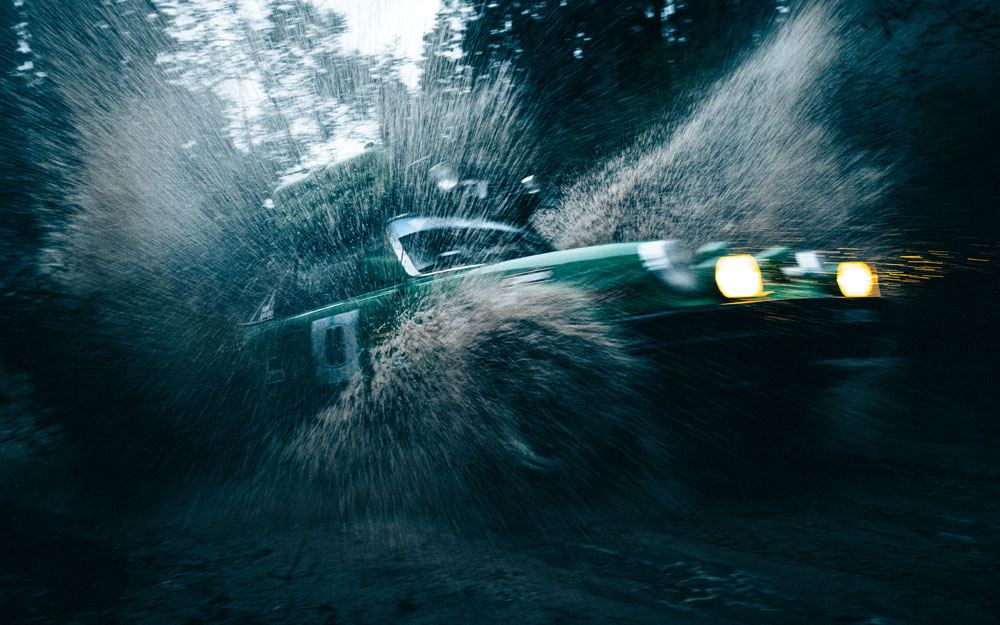
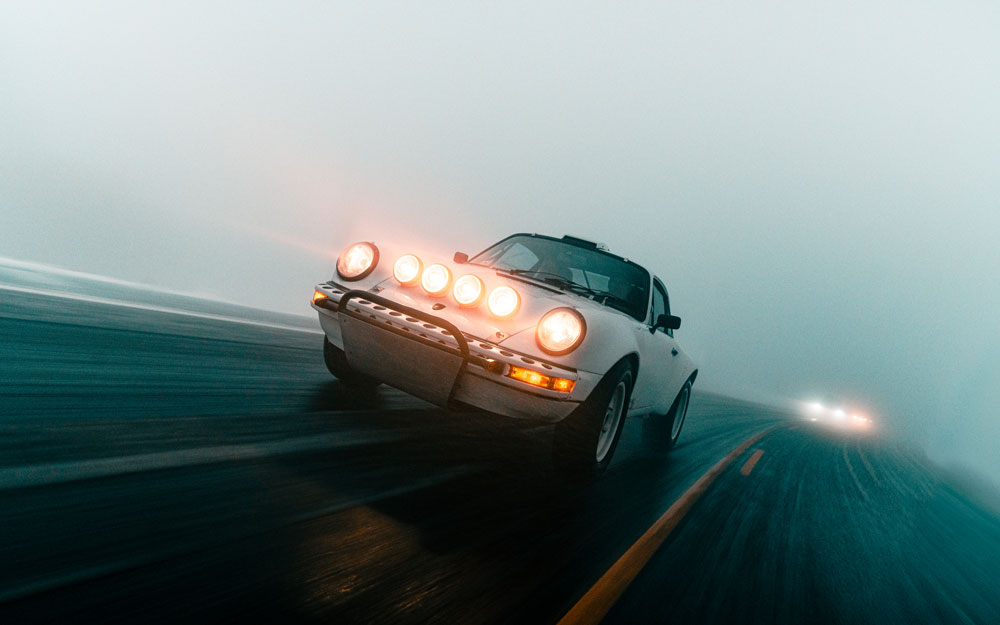
Weather can completely change the vibe of your shoot, so it’s something I always keep in mind. Rain, for example, can add a lot of texture and drama, especially in rolling shots (slow shutter speed creating motion blur) where you can see those cool streaks from the rain. On clear, sunny days, I tend to gravitate towards white concrete—it’s neutral and lets the car stand out. For night shoots, I like to experiment with neon lights or other creative lighting setups, which can give your images a whole new dimension.
The right prep work goes a long way in setting the mood and tone for your photos, so take the time to think about these elements before you start shooting.
Best Camera Settings for Car Photography
Getting the right camera settings is essential for capturing crisp, dynamic images that showcase a car’s best features. Here’s a breakdown of what works for me when shooting cars:
Optimal Aperture and Shutter Speed
One of the most common mistakes I see, especially when shooting three-quarter shots of cars, is not using a high enough aperture. I recommend setting your aperture to f/4.5 or higher to keep the whole car in focus. For shutter speed, during daylight, set it around 1/250s to freeze motion. At night, 1/60s works for static shots, but for rolling shots or moving cars, you’ll want to go as low as 1/10-15s to capture that motion blur, however when doing this make sure to set your camera on a high burst mode to better your chances of nailing the shot.
Adjusting ISO for Different Lighting Conditions
Your ISO setting is key to maintaining sharp, noise-free images, and it’s all about matching it to the available light.
Daytime: With plenty of natural light, keep your ISO between 100-200 to avoid noise and capture maximum detail.
Golden Hour or Overcast: Set your ISO to around 200-400 to adjust for softer light while keeping image quality high.
Night-Time: Start with ISO 800-1600. If the car is moving or you’re shooting light trails, you’ll be able to reduce this naturally as you’ll have a slower shutter speed. However, in dark locations with a faster shutter, don’t be afraid to bump your iso up, Sony cameras are industry leading in low light photography.
Indoor or Artificial Light: For indoor shoots, ISO 400-800 is a good starting point, depending on the lighting intensity.
Utilising Focus Modes and Techniques
When it comes to focus, Continuous AF (AF-C) is your best friend for tracking moving cars. Pair this with Wide or Zone AF to keep the car sharp as it moves across the frame.
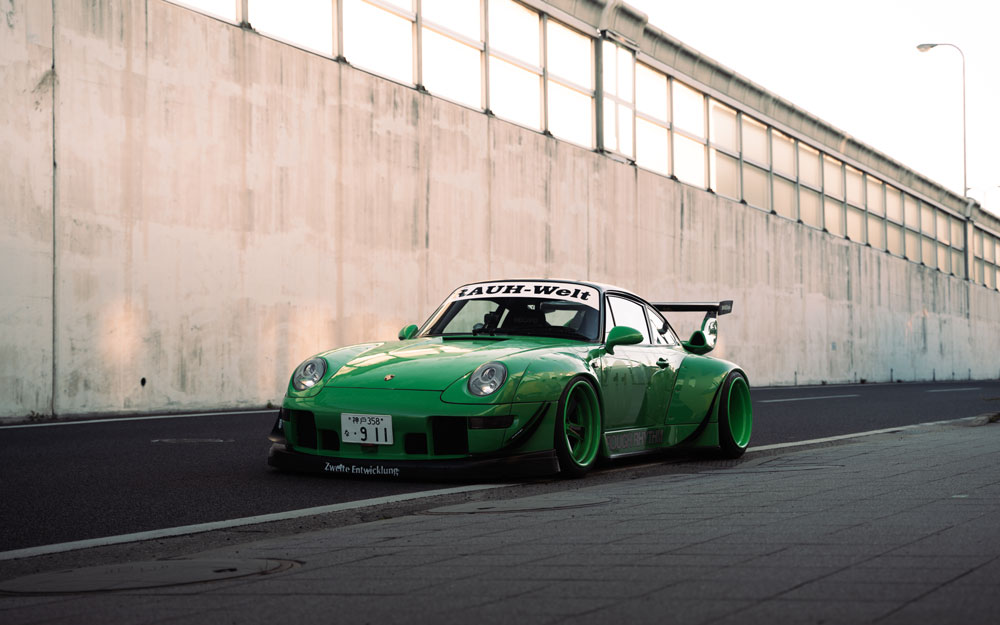
As for techniques, I like to start the shoot with standard angles—front, rear, three-quarter—just to get a solid base of shots. This rhythm builds confidence and ensures you have the essential angles covered. You don’t want to end up with a set of creative shots that lack those fundamental ones. Once I’ve got the basics, I loosen up and start experimenting with shots featuring models or moving the car into different positions. That’s when I feel the shoot really comes alive. Finally, I get into motion shots—like rolling shots—which give the car a more dynamic, natural feel.
Creative Composition Techniques
When it comes to automotive photography, creativity is just as important as the technical aspects. Your goal is to think about what truly represents the car or brand and how to showcase that vision in a way that resonates.
Finding the Best Angles for Car Photography
Experimenting with angles is key to capturing the car in the most flattering light. I often play with depth of field, creating layers by using foreground elements. A clever way to do this is by placing models in the scene or incorporating the environment—like shooting through trees to frame the car. This technique adds dimension and draws the viewer’s eye to the subject in a more dynamic way.
Incorporating Reflections and Backgrounds
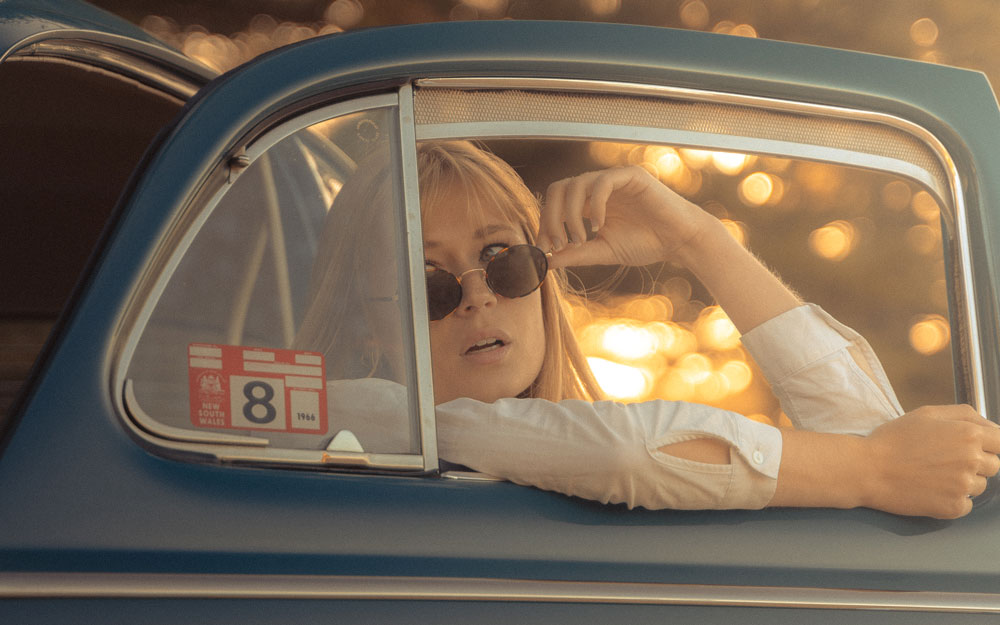
Reflections are another great tool for adding depth and intrigue to your shots. They can make an image feel more engaging, but it’s important to use them tastefully. Too much reflection or doubling of the car can distract from the subject. Similarly, backgrounds can add character and story to your images. For example, photographing a car by the beach and focusing through the windscreen on a surfer in the background creates a narrative and a connection to the lifestyle the car represents. However, balance is key—avoid overly busy or distracting backgrounds that steal focus from the car itself.
Using Leading Lines and Framing
Leading lines are a fantastic way to guide the viewer’s eye toward the car, creating a sense of movement and direction. Whether it’s a road, a fence, or even architectural elements, framing the car within these lines can enhance the composition and draw more attention to the subject. This technique adds structure to the shot while keeping the car as the focal point. For example, say you’re photographing a car in a city street, getting low and using the painted centre line can help draw the eye to the subject.
Creative composition is all about finding a balance between your subject and surroundings—whether it’s through reflections, backgrounds, or framing. The key is to highlight the car while telling a compelling visual story.
Lighting Tips for Car Photography
Shooting During Golden Hour
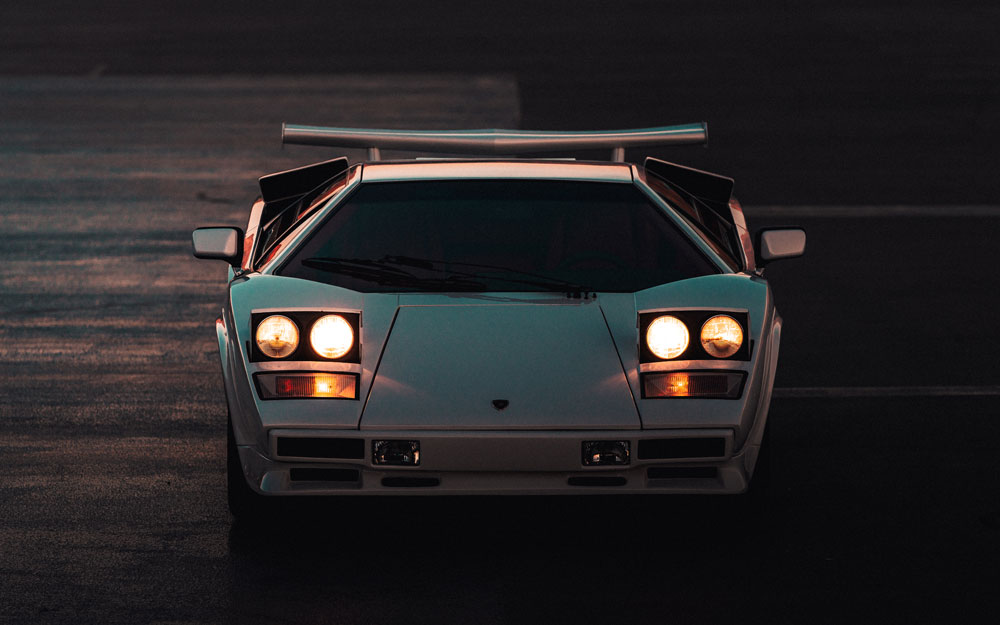
I prefer shooting during the early morning or late afternoon when the sun is at its lowest. This is the “golden hour” and it’s perfect for automotive photography. The soft, warm light helps reduce harsh shadows and glare, especially on older cars with more pronounced paint imperfections. Midday sun can be tricky, causing sun flares and streaks, which are difficult to control and often don’t flatter the car’s details.
Using Artificial Lighting and Flash
While I don’t rely heavily on artificial lighting, I do use creative lighting setups when needed. Light bars can add a unique edge to a shoot, especially for night or low-light environments. However, I find that natural light often provides the most authentic look, enhancing the car’s curves and details without overpowering them.
Balancing Natural and Artificial Light
When I do use artificial light, it’s important to balance it with the natural light on set. I prefer to use the shadows and highlights that naturally occur, using them to sculpt the car’s form and add mood to the scene. By working with the available light, I’m able to capture more dynamic, visually interesting shots that feel true to the car’s essence. The key is in finding harmony between both light sources to create a cohesive, impactful image.
Editing Car Photos for Professional Results
When it comes to editing car photos, my approach is all about maintaining the integrity of the scene while enhancing the car’s presence. One key tip is to avoid overexposing or over-lifting shadows, a mistake I often see where people reveal too much of the lower parts of the car, losing the mood of the shot. Instead, I work with the natural shadows and highlights to build intrigue and depth, creating images that leave viewers wanting to explore the entire set.
For colours and contrast, I typically go for a slightly muted or desaturated look, much like my preference for minimal backgrounds—this ensures the focus remains on the car without overwhelming the frame with intense colours. However, it’s vitally important to keep the car’s true colour intact, never straying from its specs.
Masking is a crucial technique I rely on to fine-tune the image and guide the viewer’s attention. It allows me to emphasise areas where the lighting works best while controlling reflections and distractions. Speaking of reflections, while removing them—especially if you spot yourself in the shot—can be tricky, it’s often necessary to remove blemishes and other minor distractions, giving the image a more polished, professional feel without compromising the authenticity of the scene.
To conclude
Overall, there’s no wrong or right way to photograph a car, however throughout this article I’ve tried to steer you in the direction of what is most practiced, especially in industry. What I hope from this is that you’ve sparked interest or reignited a passion to plan an automotive shoot and get experimental in the way you perceive that car and how you can enhance the narrative behind the product it essentially is. If you’re keen on seeing what I get up to, be sure to go follow my Instagram or Behance profile (@willis.newman) where I post automotive as well as a variety of other categories and valuable content which you can use as reference for your next shoot.