


Why mastering light is key in landscape photography
Light is essential to our very existence on Earth. By harnessing it, we can capture the beauty of the natural world, conveying a sense of both the essence of a place and a unique moment in time. We create atmosphere or mood by first finding interesting compositions and then using light and shadow to highlight key elements and tell the story of that moment. As a landscape photographer, using light effectively is critical to the success of our images.
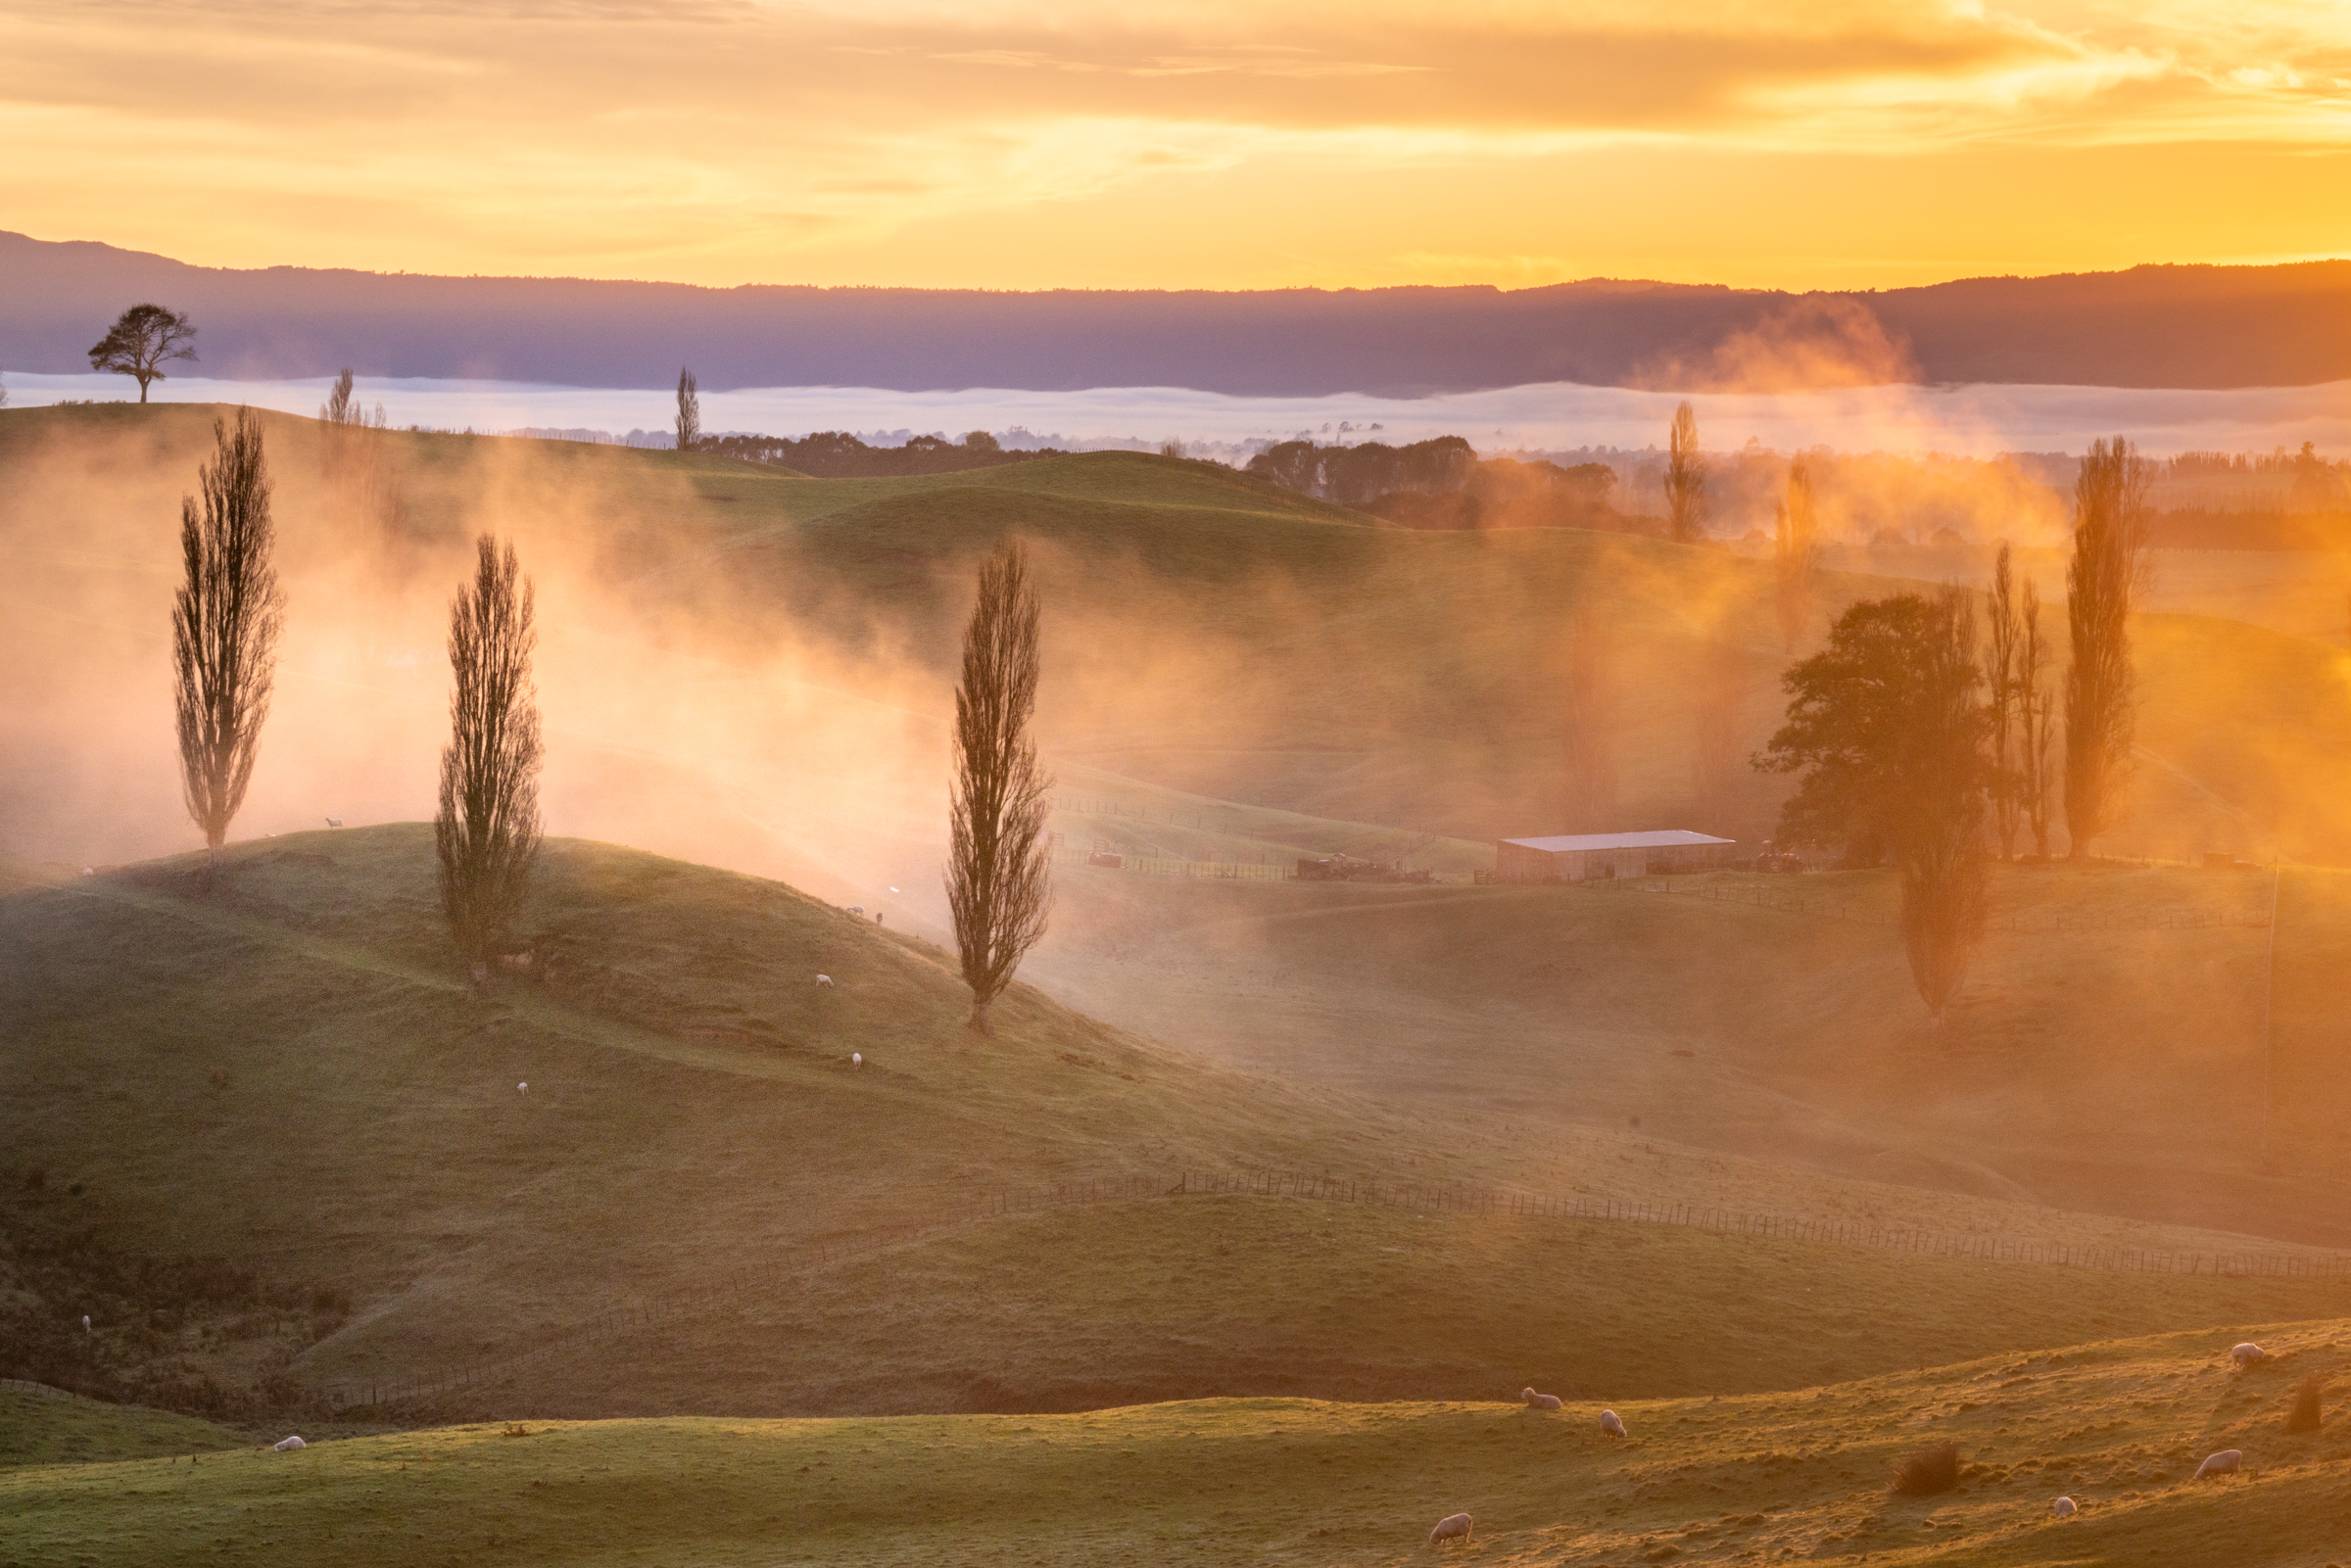
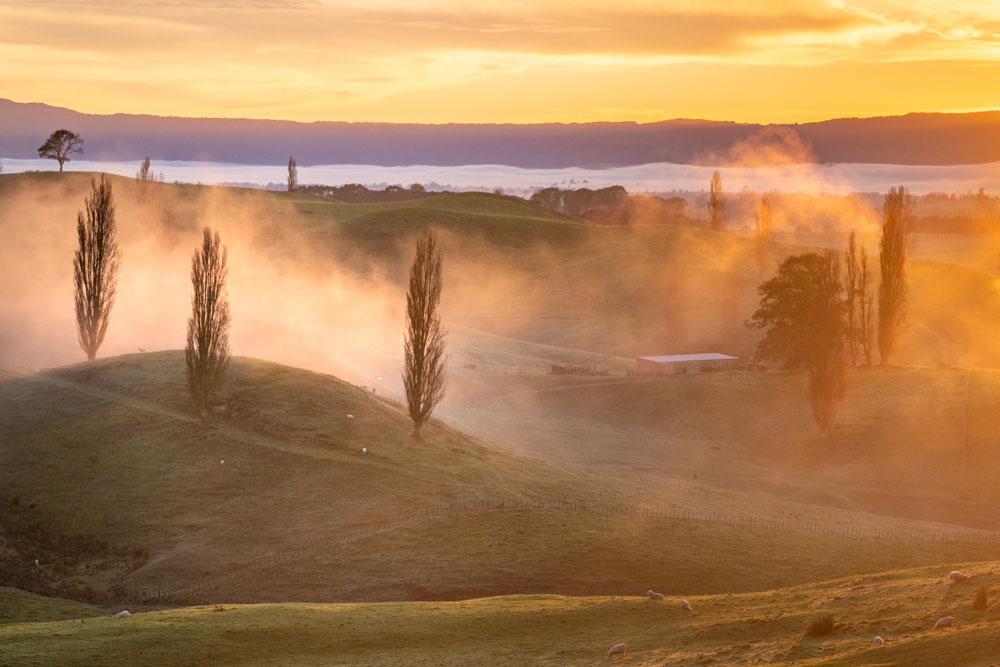 Side lighting with atmospheric mist and fog brings details to life
Understanding natural lighting conditions
Light naturally creates highlights and shadows, adding both depth and contrast to a scene. Side lighting, found during golden hour or in winter months when the sun is lower in the sky, allows the landscape to appear more three-dimensional. Backlighting can create stunning silhouettes or emphasize atmospheric elements like mist and fog. Incorporating sunlight directly into a scene, for example through the use of a sunstar in the forest or during sunrise and sunset, can also add drama and highlight details. Alternatively, you might deliberately choose to have the light coming from directly behind you to capture the pastel hues only visible during dawn and dusk.
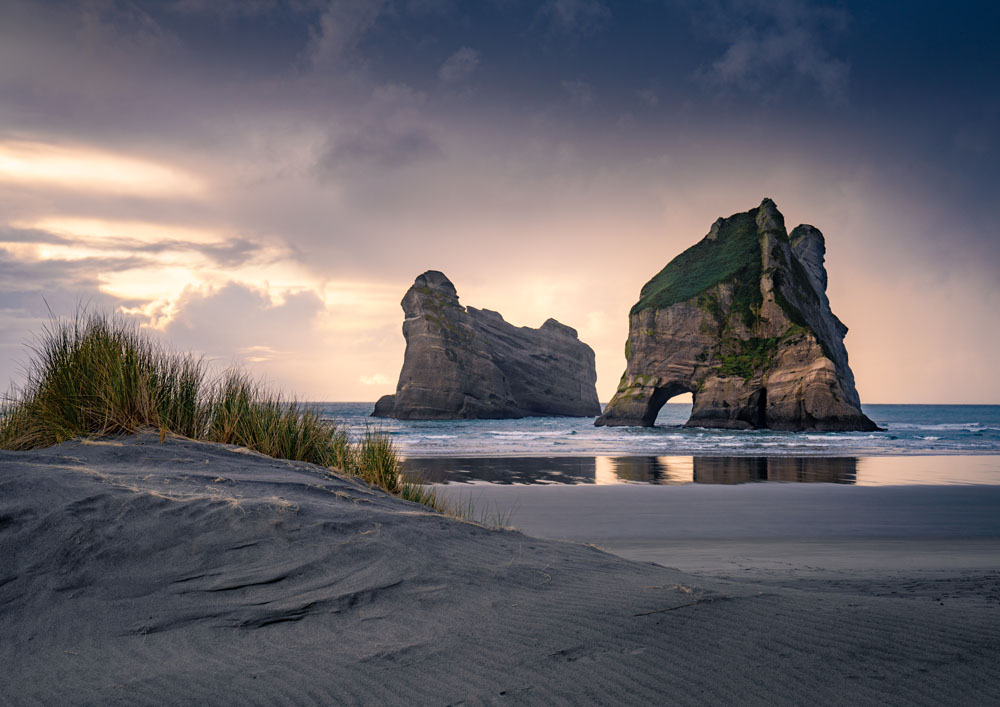
 Backlighting illuminates details in the rocks and flax in the foreground
Making an informed decision about when to shoot a specific scene will greatly enhance your results. Some locations naturally suit the cooler tones found in blue hour before sunrise and after sunset, while others come alive during golden hour while the sun lights up the landscape. You may find you have to visit a location multiple times at different times of the day and in different seasons before you learn these subtleties. As a rule, I usually try to avoid shooting during the harsh light in the middle of the day, unless there is cloud cover to create more even lighting. Even then, I prefer heading into the forest to photograph rivers or waterfalls, saving open landscape scenes for shooting with lower light at either end of the day.
Techniques for capturing the best light
Once you are at a location, it’s worth taking time to assess the scene before you start clicking the shutter. Consider whether using Neutral Density filters will enhance your image by extending your shutter speed to create a long exposure effect with moving water or clouds. A circular polariser will not only reduce glare and reflections, but can also help enrich your colour palette. It is particularly effective with blues in the sky or greens in the forest when used at the correct angle, with the best effect usually found at 90 degrees orientation to the sun.
 Side lighting highlights contours in the land during a winter sunrise
Our goal is usually to retain highlights and colour information in the sky without the landscape becoming too underexposed, and this can be difficult if the scene has an extreme dynamic range from dark to light. Even though the latest Sony mirrorless cameras offer incredible technology to overcome this, sometimes it is just too difficult to shoot a balanced exposure successfully in one frame. Using a graduated filter to darken the brighter part of the scene, or taking a series of shots (exposure bracketing) at different shutter speeds to create the right exposure for all the different elements from dark to light can make an impossible scene suddenly possible.
Post-processing to enhance lighting
Taking a photo that combines a unique composition and balanced lighting is only the start of a great image, merely giving you the raw data to make the magic happen in post-processing. What separates a good image from a great one is the development and fine tuning of an image after taking the shot. Using a program such as Lightroom to effectively enhance the interplay of light and shadow takes skill and attention. It can be tempting just to use the Auto Feature in Lightroom which instantly adjusts exposure, contrast and adds some dodging/burning using highlights and shadows, whites and blacks, but this is only the beginning of creating a masterpiece.
These days, Lightroom’s extensive suite of Masking Tools give you infinite control over individual areas where lighting can be enhanced or better balanced within an image. My personal favourite is the Brush Tool which gives you the best refinement for targeted results. Remember to explore other adjustment panels that also change lighting, for example using Colour Luminance on cooler tones like greens and blues will change the brightness of the individual colours, in turn changing how the light seems to fall in the scene. The use of Colour Grading to cool the shadows and warm the highlights is another technique that makes use of complementary colour tones on opposite sides of the colour wheel to change the ambient mood in a scene. Applying a monochrome treatment to an image will often enhance contrast and drama far more than retaining colour, allowing you to focus on form and texture within the scene.
 Black and white treatment focusing on shapes and textures
Practical tips for landscape shoots
Ultimately, the successful capture of an image may rely on weather conditions outside of our control. However, with a little pre-planning and research, you can significantly increase your chances of success. With apps like PhotoPills, you can learn the best position for the sun to achieve the optimal lighting situation for that scene. Studying weather forecast apps like Yr.No and Windy and then seeing how these forecast conditions translate to reality out in the field will help you learn to recognise patterns and how different types of cloud cover will impact lighting for future reference.
 Colour grading with cooler shadows and warmer highlights
Stormy weather need not be a reason to stay indoors, often this creates the most dramatic and unusual lighting if you are willing to take the risk and go. A forecast with 100% high cloud cover can translate to fiery, colourful skies if there is a small gap on the horizon where the sun will be rising or setting. It is useful to research images from a location online in advance to give you an idea of how the light may fall at a location for a specific time of day, but it is equally important to arrive early and scout compositions before the light begins to work its magic - there is nothing worse than arriving at the last minute in a panic and having to ‘make do’ with the first composition you find.
 A completely rained out shoot, but at the last minute the sun broke through heavy clouds to reveal this scene
A good landscape photographer will also have to be patient and willing to adapt to changes in light over a longer period. A scene that may not have been ideal to shoot can suddenly become viable with just a small change in the weather, so persistence is key. On the flip side, we often arrive at a location with a specific vision for lighting and composition, only to find that the timing isn’t quite right. Some locations have required several visits over the years before I was able to capture an image that truly did the scene justice. Equally, be open to creating a completely different image than what you originally envisioned. Unexpected weather conditions can yield unique lighting situations, enabling you to create a one-of-a-kind image that may never be captured again.

Meghan Maloney
Hey! I’m Meghan, a landscape & travel photographer based in the Waikato, home of Middle-earth.
I’m head over heels in love with New Zealand and my great passion is to share this amazing country with others wanting to experience its beauty and improve their photography skills at the same time.
I love capturing the symmetry of reflections in nature, lush waterfall scenes and the vibrant colours of sunrise and sunset as well as NZ's incredible night skies. I specialise in small group photography adventures throughout New Zealand as well as private masterclasses for tailored one-on-one learning. I also offer online photography learning so photographers can hone their skills in their own time and at their own pace and I share free travel and photography tips on my website too.
I really enjoy sharing my knowledge with others and making the learning experience fun. It’s rewarding seeing participants on my workshops and courses master new techniques and the excitement they have over images they have captured.
I've also been privileged to work as a photographer in Antarctica for the past two seasons, and I am now offering photography tours in locations such as Antarctica and Iceland.
My work is used regularly to promote New Zealand in large format on billboards at Auckland Airport and promoting destinations in my home Waipa region, as well as featured in publications such as National Geographic.
You can find more of my work at Meghan Maloney Photography.


