If you have struggled capturing images in low light, this article may just be the key to helping you understand and make your low light pics stand out from the crowd.
I must start by stating, the tips and techniques explained within this article are what work for me based on the camera gear I use and the style of image I am going for.
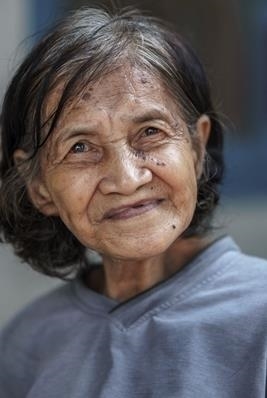
1. My number one tip for taking photos in low light is: don't be afraid of high ISO.
Will there be noise or grain? Yes, of course, but a large percentage of media being consumed these days, is viewed on mobile devices and tablets, where the noise is almost not visible. Noise or grain can also be very positive, giving the image a vintage or film like appearance.
| Sony Alpha 7R III | 24mm | ƒ/1.4 | 160 sec | ISO 16,000 |

2. Lens selection and camera settings for low light photography.
Cameras such as the Sony Alpha 7 III have fantastic low light capturing performance, and coupled with fast glass (ƒ/2.8, ƒ/1.8, ƒ/1.4, ƒ/1.2) can produce amazing results in extremely low light. If you are limited to lens with a maximum aperture above ƒ/2.8, it is important to find your optimum hand held shutter speed.
So the slower the shutter speed, the lower the ISO needs to be to maintain a correct exposure. Typically I find that I can shoot at around 1/60th of a sec hand held, but your hands may be steadier than mine allowing you to use a slower shutter speed and therefore a lower ISO.
My typical low light photography settings are between 1/60 sec to 1/160 sec, ƒ/1.4 or ƒ/2.8 and an ISO range anywhere from 3000 to 12800. This will of course vary depending on the light available on location.
As I am typically shooting wide open (lowest ƒ/number) I like to shoot in fully manual mode and adjust the ISO where necessary. On occasion I also use auto ISO, when the light in the room is constantly changing, for example night clubs and bars with stage lights.
The focal length you decide on is a personal choice, but will again depend on the light available and the size of the area you find yourself in. In low light situations I prefer using either the 24mm ƒ/1.4 GM lens, or the 24-70mm ƒ/2.8 GM.
3. Flash photography and settings in low light.
| Sony Alpha 7 III | 24mm | ƒ/4.0 | 1/30 sec | ISO 400 |

I prefer to minimise the use of flash and typically turn it on when capturing groups of people, or when there is insufficient available light to illuminate them fully.
The use of flash in most night scenes tends to remove a lot of the ambient light and colour, so I like to have my camera set to a fairly slow shutter speed of 1/30 second, with an aperture between ƒ/4.0-ƒ/5.6 and ISO of 400-800. I have the flash mode set to TTL with -1 or -2 flash compensation and second curtain/rear sync.
Slower shutter speeds will allow the ambient light to still come through, whilst the flash will illuminate and freeze your subject. If your subject is moving quickly you will see some motion, which along with bright coloured lights can produce some artistic effects.
You can reduce your shutter speed even lower and move your camera in a circular, or in a side to side motion, to produce some interesting results like the image below. This is known is shutter drag.
Don’t be afraid to try something different as it is a great way to improve.
| Sony Alpha 7 III | 24mm | ƒ/5.6 | 1/4 sec | ISO 1600 | SHUTTER DRAG |

4. Focusing in low light.
Maybe the hardest part of shooting in low light is focusing, but it's not impossible.
For capturing people with a flash, I prefer to set the focus area to wide and mode to single. In low light this gives my camera every opportunity to lock focus on what's in front of me. As I am usually at ƒ/4.0-ƒ/5.6 it doesn't really matter if it picks up focus on the front person, or the back, but it quite often saves you that awkward moment of your camera just not finding any focus at all. I also turn on the AF illuminator within the camera, as well as on my flash.
Focusing when shooting without a flash is a little different and depending on the available light, I will either use the Sony Eye-AF function, with continuous AF and the wide or zone focus area, or the medium or large flexible spot.
5. Making use of your camera memory functions for low light photography
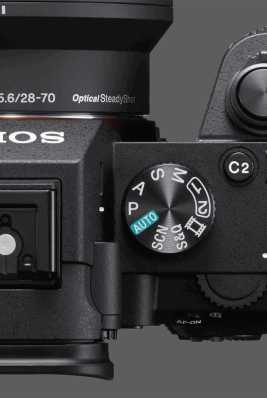
If available on your camera, I strongly recommend making use of the memory functions, which are usually accessed on the mode dial and setup within your camera’s menu.
For each of my camera bodies, I have setup “Mode 1” as my low light, high ISO setting and “Mode 2” with my flash settings. This makes it quick and easy to switch between flash and no flash settings without having to lower the camera and take time to change settings.
As mentioned at the start of this article, the settings and tips above are by no means the only way to capture images in low light – they are a great starting point for you to develop your own style and method. You will find each location will differ slightly and with experience, you will be able to adapt and find the settings and techniques that work for you. So get out there and start practicing.


