


_1726835161814.505.jpg?mode=crop&width=200&height=200&format=webp&quality=90)
Introduction to Star Trails in Astrophotography
Star trails represent one of the most captivating forms of night photography, transforming ordinary night skies into swirling patterns of light that reveal the Earth's rotation. Unlike a standard night sky image, star trails showcase movement and time, creating circular patterns that tell a story about our place in the universe.
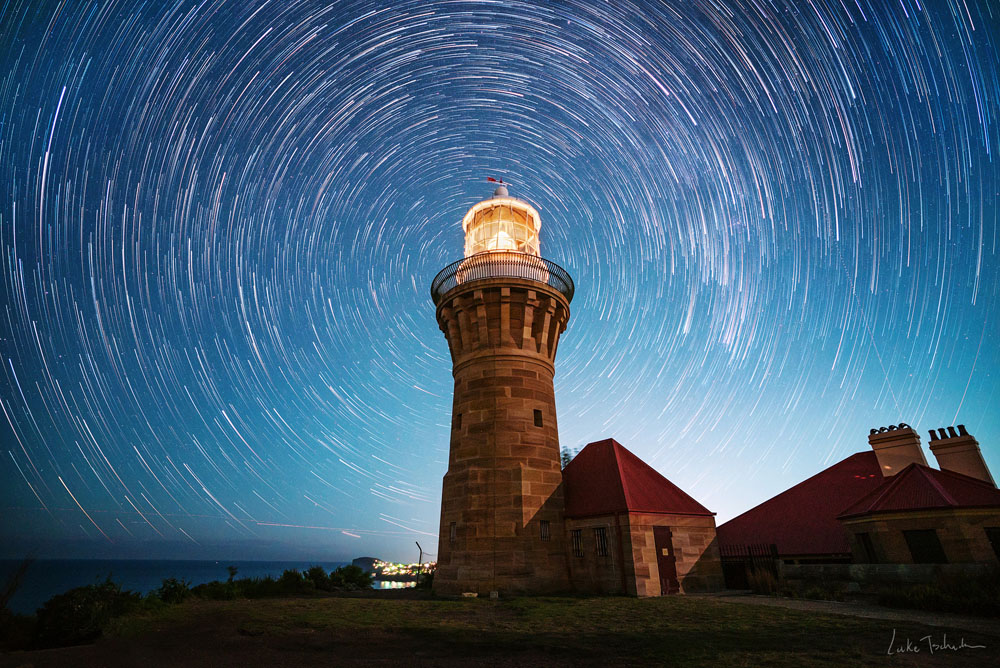
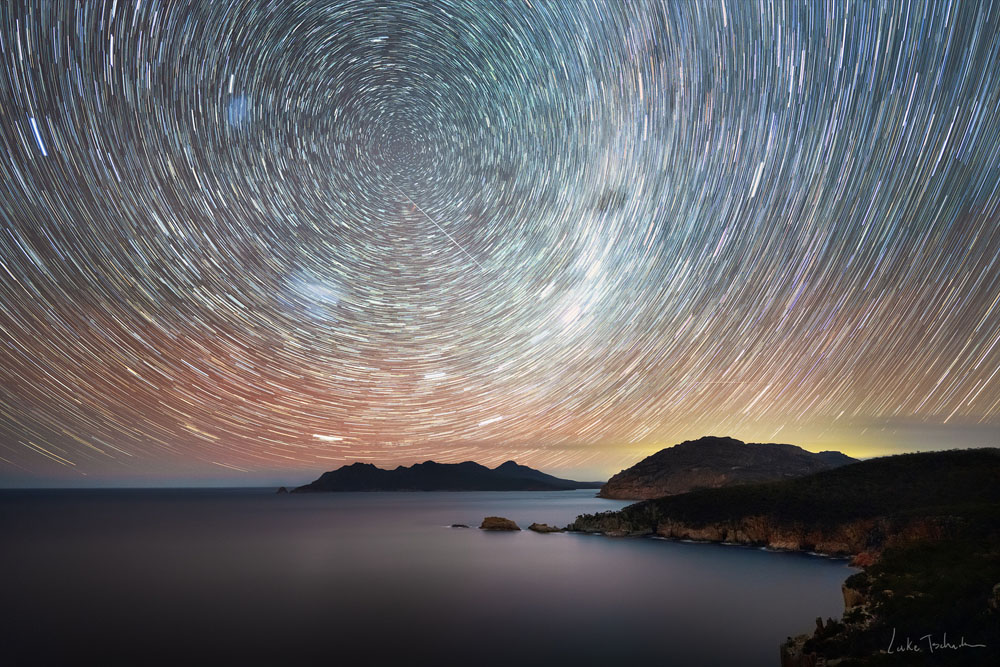
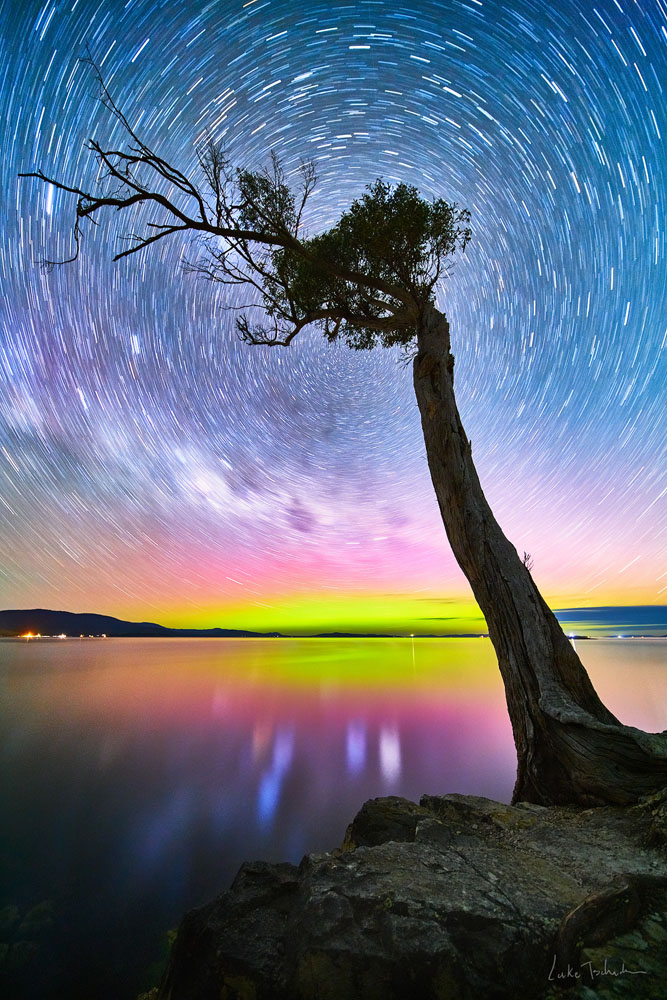
For photographers in Australia and New Zealand, we're uniquely positioned to capture something truly special: circular star trails around the South Celestial Pole. This astronomical point sits directly above Earth's South Pole, creating distinctive concentric circles as stars appear to revolve around it throughout the night.
The best part about star trail photography is you don’t need pitch-dark skies or expensive gear. Even brighter skies can produce awesome trails. With basic knowledge, proper planning, and patience, you can create stunning images that showcase both the night sky and the stunning landscapes of Australia and New Zealand.
Essential Gear for Capturing Star Trails
Choosing the Right Camera and Lenses
Most Sony Alpha cameras can capture great star trails. While the Alpha 7 and Alpha 7S series excel in low-light performance, you can achieve impressive results with the Alpha 7R and Alpha 1 series, or even crop-sensor cameras like the Alpha 6700. The key is having a camera with good battery performance and reliable long-exposure capabilities.
Wide-angle lenses are ideal for star trails, allowing you to capture more of the sky and interesting foreground elements:
- Sony FE 14mm GM F1.8 – Exceptional wide-angle prime with excellent light-gathering ability
- Sony FE 16-35mm F2.8 GM II – Versatile zoom with excellent optical quality
- Sony 12-24mm f/2.8 GM – Ultra-wide zoom for capturing extensive sky coverage
Essential Accessories
A sturdy tripod is absolutely critical – your camera will remain stationary for hours, so stability is non-negotiable.
Dew prevention equipment is often overlooked, but it can be crucial depending on the climate of your location. When shooting throughout the night, your lens can drop below the dew point, leading to condensation that can ruin your images. To prevent this, you can use purpose-made USB lens heaters (easily found on eBay), or simply wrap a couple of hand warmers around your lens using a rubber band as a DIY solutioLight pollution filter can be helpful if shooting near urban areas, reducing colour casting and improving contrast in the night sky.
External intervalometer if your camera doesn't have a built-in option (most newer Sony models do).
Comfort items: A decent head torch, plenty of warm clothes (because standing around at night gets cold fast), extra batteries (the cold eats these quicker than you’d think), and a power bank to keep things running longer.
Top Locations for Star Trails in Australia and New Zealand
Popular Star-Gazing Spots
Finding the perfect location for star trail photography is about seeking south-facing vantage points with minimal light pollution and compelling foreground elements.
In New South Wales, Warrumbungle National Park offers Australia's first Dark Sky Park with pristine night skies. Victoria's Grampians provide dramatic rock formations that serve as perfect foreground elements. South Australia's Flinders Ranges offer outback landscapes beneath crystal-clear skies, while Western Australia's Pinnacles Desert creates otherworldly silhouettes against star trails.
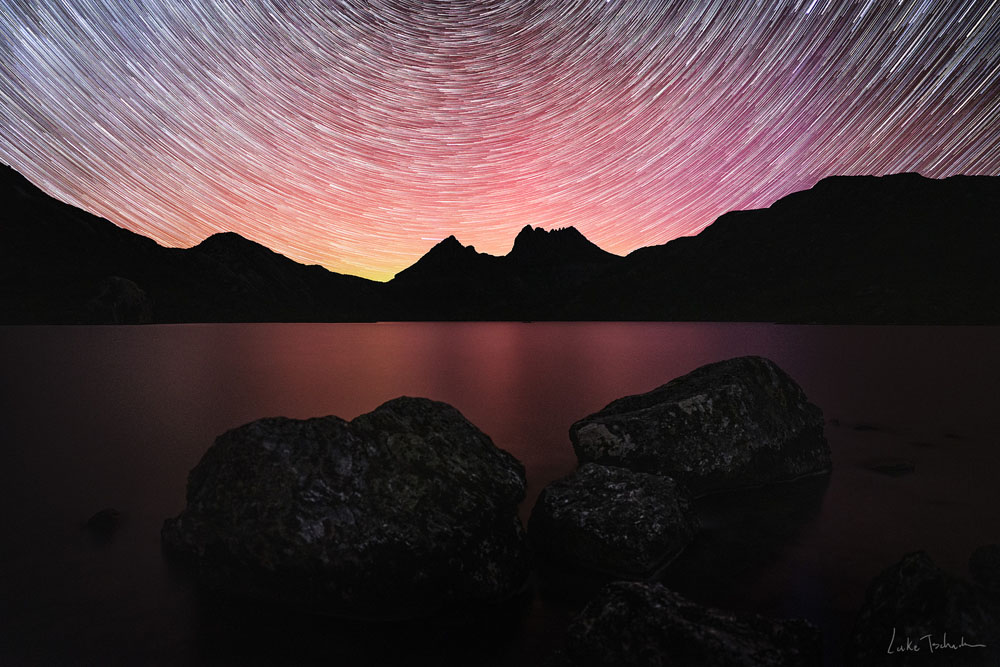
In Tasmania, kunanyi/Mt Wellington provides easy access to dark skies from Hobart (check winter closures), while Cradle Mountain and Coles Bay in Freycinet, with views of the Hazards, offer iconic compositions.
Tips for Shooting and Navigating Remote Locations
When exploring these remote locations, safety should be your priority:
- Visit during daylight to check for hazards and confirm your composition works.
- Inform someone of your location and expected return time.
- Pack appropriate clothing, footwear, and navigation equipment.
Best Times and Seasons
The beauty of star trail photography is its year-round accessibility. While winter offers longer nights and clearer skies, any season works provided you have dark, clear conditions.
Unique Landscapes to Look Out For
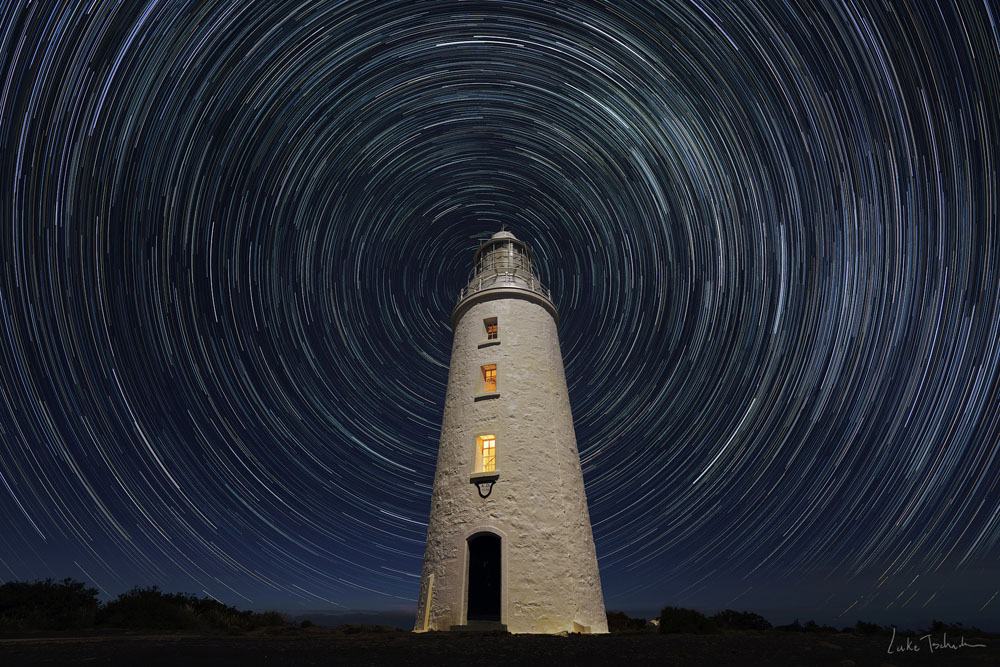
Look for foreground elements like dead trees, ruins, rocky outcrops, jetties, or reflective surfaces that create a visual dialogue with the patterns above. These south-facing locations double as aurora-watching spots, which is a bonus if the southern lights appear during your shoot.
Optimal Camera Settings for Capturing Star Trails
There are two primary approaches to capturing star trails: the single long-exposure method or the multiple-exposure stacking technique. While both can produce great results, the stacking method is generally preferred for its flexibility and resilience to unexpected interruptions.
Multiple Exposure Stacking Method (Recommended)
The stacking technique captures multiple shorter exposures that are later combined in post-processing:
- Shooting menu → Drive Mode → Interval Shoot Function
- Set Interval Shooting to 'On'
- Shooting Start Time: 2-3 seconds (prevents initial camera shake)
- Shooting Interval: 1 second (ensures seamless transitions)
- Number of Shots: Set this high (like 9999) and manually stop the sequence once you have enough frames. Let it run as long as possible—an hour is a good start.
- AE Tracking Sensitivity: Low
- Shutter Type: Electronic (preserves mechanical shutter lifespan)
- Shoot Interval Priority: On
Key Settings for Stacking Method
- Aperture: f/1.8-f/4 (wider apertures gather more light)
- Shutter speed: 10-30 seconds (adjust based on brightness)
- ISO: 800-1600 (balance between noise and sensitivity)
- White balance: 3900-4200K (creates natural-looking night sky tones)
The stacking method offers a major advantage. If a car’s headlights, an aircraft, or another bright light source enters the frame, you can simply remove that individual image during post-processing. This flexibility in handling unexpected interruptions is why I prefer it for star trail photography.
Using Bulb Mode for Long Exposures
The single long-exposure method is simpler but requires careful settings to prevent overexposure and minimise noise:
- Navigate to Exposure/Colour menu → Exposure → Bulb Timer Settings → Set to 'On'
- Set your desired exposure duration; For single long exposures, aim for at least 15–30 minutes (900–1800 seconds) to get visible trails, depending on sky brightness.
- Switch the camera to Manual mode (M), set shutter speed beyond 30 seconds until ‘Bulb’ appears, which allows for manually timed exposures.
- The camera will automatically end the exposure after your preset time.
Key Settings for Single Exposure Method
- ISO: Keep low (100-320) to minimise noise during the long exposure
- Aperture: Typically f/2.8-f/4 depending on available light
- White balance: 3900-4200K creates natural-looking night sky tones
This method works well on exceptionally dark nights but risks overexposure if any ambient light enters the scene, and a single bright interruption can ruin the entire exposure.
Advanced Tips and Techniques for Star Trail Astrophotography
Incorporating Foreground Elements
Consider capturing dedicated foreground shots to combine with your star trails:
- Same-time capture: Take foreground shots during your star trail session by briefly illuminating the landscape with subtle lighting.
- Blue hour capture: Photograph your foreground during twilight when there's enough ambient light to see detail, then blend it your night sky images later.
For either method, take separate images focused specifically on the foreground, otherwise it seems like the literal act of focusing.
Creating Time-Lapse Videos from Star Trail Sequences
Your star trail sequence can also become a mesmerising time-lapse video using specialised software like LRTimelapse, Photoshop, or Premiere Pro. Each individual frame from your star trail sequence becomes a frame in your video, creating the illusion of stars rotating around the South Celestial Pole.
The 500 Rule for Star Trails
The old 500 rule (dividing 500 by your focal length) was once a handy trick to avoid star trails in a single shot. But with today’s high-resolution cameras, it’s not always reliable. For more precision, use the PhotoPills app's "Spot Stars" calculator, which accounts for your specific camera/lens combination.
Overcoming Common Challenges
Dealing with Light Pollution and Cloudy Skies
Urban light pollution creates an orange/yellow glow that diminishes star visibility. Consider:
- Consulting LightPollutionMap.info to find darker locations
- Using dedicated light pollution filters that reduce artificial light wavelengths
- Positioning yourself where natural features (such as mountains or hills) block city lights can significantly reduce unwanted glare.
- Shooting after midnight when many artificial lights are turned off
Clear skies are essential for star trails. Use forecasting tools like Windy.com to check cloud coverage and dew point predictions before heading out.
Preventing and Managing Condensation on Lenses
When lens temperature drops below the dew point, condensation forms and ruins your images. Prevention is key:
- Monitor dew point forecasts using Windy.com
- Apply dew heaters before condensation begins (once it starts, it's too late)
- Check your lens frequently during long sessions
Avoiding Gaps in Star Trails and Flickering
Gaps in star trails occur when there's too much delay between exposures. Setting Sony's intervalometer to 1-second ensures each exposure begins immediately after the previous one ends.
For time-lapse sequences, flickering (brightness variations between frames) can be distracting. LRTimelapse's deflickering module works wonders, or you can manually adjust exposure consistency in Lightroom.
Post-processing Your Star Trail Images
Basic and Advanced Post-Processing Techniques in Software
If you've captured a single long exposure, your processing workflow is straightforward:
- Apply basic adjustments for contrast, white balance, and colour
- Remove hot pixels using Photoshop's Dust & Scratches filter with a radius of 1-2 pixels
- Apply selective adjustments to foreground and sky elements as needed
Stacking Images to Create Smooth Star Trails
For stacked images, several software options make the process easier:
StarStaX (Windows/Mac, Free) This purpose-built program is my preferred method for star trail stacking:
- Import your sequence of images
- Select "Gap Filling" to create seamless trails
- Choose blending mode (Lighten works well for most situations)
- Process and export
I personally use StarStaX for all my star trail work. It’s free, purpose-built for this process, and delivers excellent results with minimal complexity
Sequator (Windows, Free) Another versatile option that handles star trails and standard night photography.
Photoshop Method: If you already have Photoshop, you can also use this approach:
- File → Scripts → Load Files into Stack (select your sequence of star trail images)
- Select all layers in the Layers panel
- Change the blend mode of all layers to "Lighten" or "Screen" (Lighten works best for star trails)
- Optional: Create a layer mask to adjust foreground elements separately
- Flatten the image when satisfied and apply final adjustments
For all these methods, consider making separate adjustments to your foreground and sky elements. Often the foreground benefits from noise reduction, while the sky might need contrast adjustments to make the star trails pop.
Star trail photography offers a unique way to witness Earth's rotation through your camera. With just a south-facing view, stable tripod, and patience, you can transform ordinary landscapes into extraordinary scenes. Accessible to all skill levels using Sony Alpha cameras, this technique works year-round even without perfectly dark skies. By combining circular star movements with interesting foreground elements, you'll create standout images for the 2025 Alpha Awards. Experiment, push boundaries, and enjoy the awe-inspiring experience of shooting under the southern night sky.
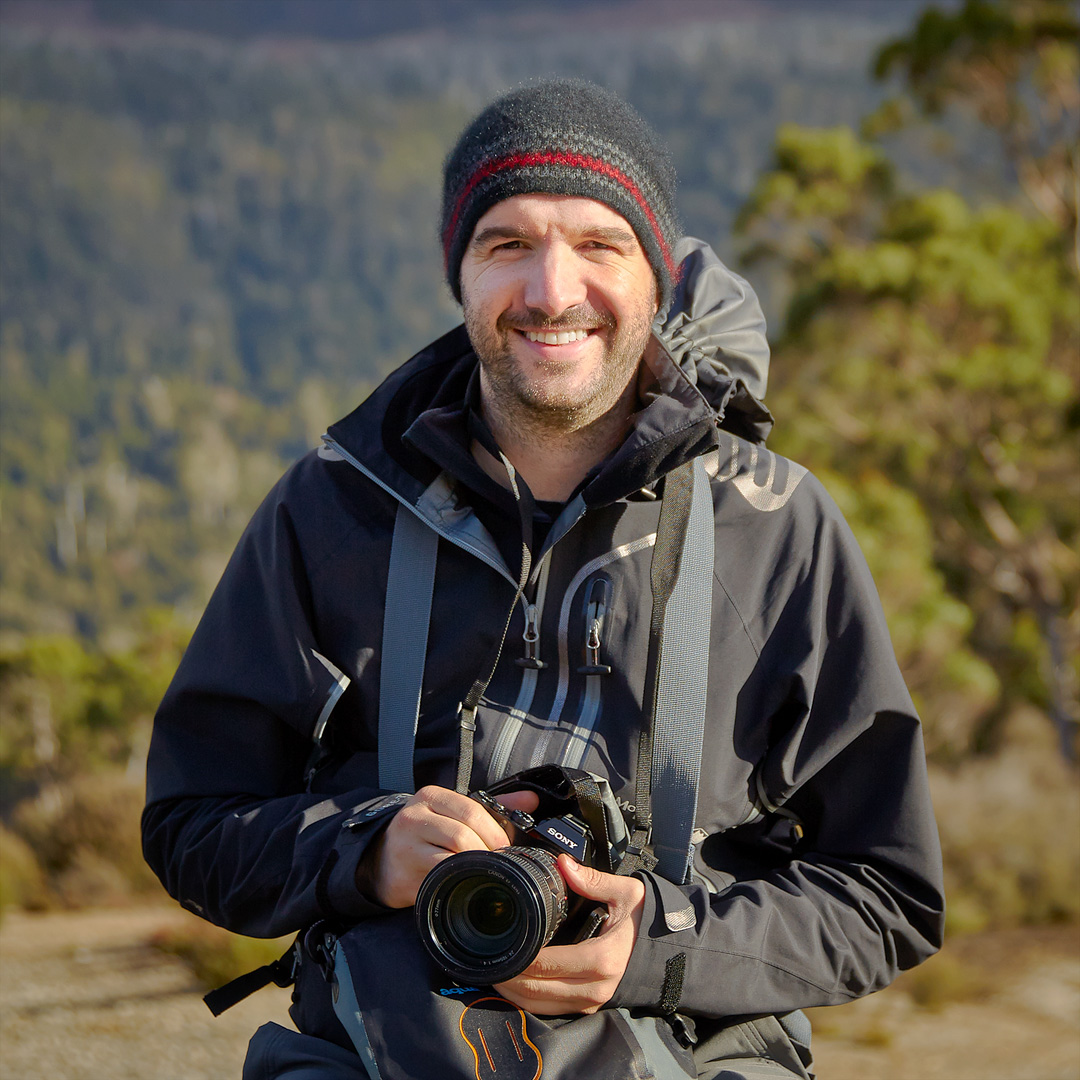
Luke Tscharke
Hi there! I'm a landscape, nature, and travel photographer living and working in Hobart, Tasmania. Photography has always held a special place in my heart, but embarking on this career was initially unplanned. My background in science and biology didn't quite prepare me for the profound connection I would feel capturing nature's fleeting, beautiful moments. It was during one particular sunset, alone in the Tasmanian wilderness with my camera at the ready, as I watched a cloud over Barn Bluff ignite in a brilliant orange halo, that I felt more alive than ever before. In that moment, I understood—photographing the landscape was what I was meant to do with my life.
My work is deeply rooted in a love for the natural world, aiming to preserve its beauty and share its stories. Whether braving the wild elements or quietly observing a serene landscape, each photograph represents a chapter of my adventure, a testament to the extraordinary beauty that surrounds us.
One constant throughout my career has been my enjoyment of Sony cameras, starting with the DSC-V1 in 2002 and embracing the entire Alpha 7R line since 2014. This long-standing relationship with Sony gear has been a pivotal part of my photographic journey. I'm incredibly proud to be a Sony advocate, as their cameras have not only been with me every step of the way but also have continually pushed the boundaries of what I can capture. This commitment to using the latest gear is all part of my dedication to delivering breathtaking images.
Beyond photography, my love for bushwalking allows me to connect with the landscapes I photograph on a personal level, enriching my work with genuine appreciation and understanding of the natural world.
Looking forward, I'm excited to further explore nightscape and aurora photography, sharing the mesmerising beauty of the night sky. My aim is not just to capture images but to inspire others to see the world through a lens of wonder and exploration.
I am dedicated to connecting with fellow nature lovers and photographers. Through my workshops, prints, and stories, I aspire to inspire others to appreciate and document the beauty of our planet in their unique way. Come join me for a workshop online or down here in Tasmania!


