You’re about to head overseas on a photography trip. Somewhere rugged, with towering mountains, glacial valleys and sweeping vistas around every corner. You’re packing your bag with all of this in mind, what lenses are you choosing? Something wide, right? Maybe a 16-35, or a 24-70?
This is how I've always travelled, with the belief that I need to cram as much beautiful scenery as I can into a single frame.
On a recent trip to New Zealand, I tried something new. I'm here to make the case for another type of lens that will force you to think more, but in return reward you with stronger, more focussed images.
I speak of course of the humble telephoto lens.
To 135mm, and beyond!
When I say telephoto, I’m talking the biggies. The 135mm and beyond. When you’re used to a wide angle world, this can be an uncomfortable, claustrophobic place to be.
“What even happens here? How am I supposed to get the mountain and the river in frame? Why is everything so close? This is awful, I’m going back to 24mm where everything makes sense.”
Admittedly, I’ve thought all of these things. It takes work. You’ll get frustrated, and want to throw your camera at a rock. Don't do that. The trick is to stick with it. Keep the 400mm monster on the end of your camera until something clicks into place. You’ll know it when you see it, but in every scene there’s a detail hiding somewhere for you to capture.

Details, Details, Details!
What do I look for when I shift into telephoto mode? Normally a combination of these four things:
Details. Textures. Compression. The Abstract.
Once you’ve shifted what you’re looking for, things will begin to fall into place. The big sweeping vistas aren't important, you’re looking for the details that make up the scene.

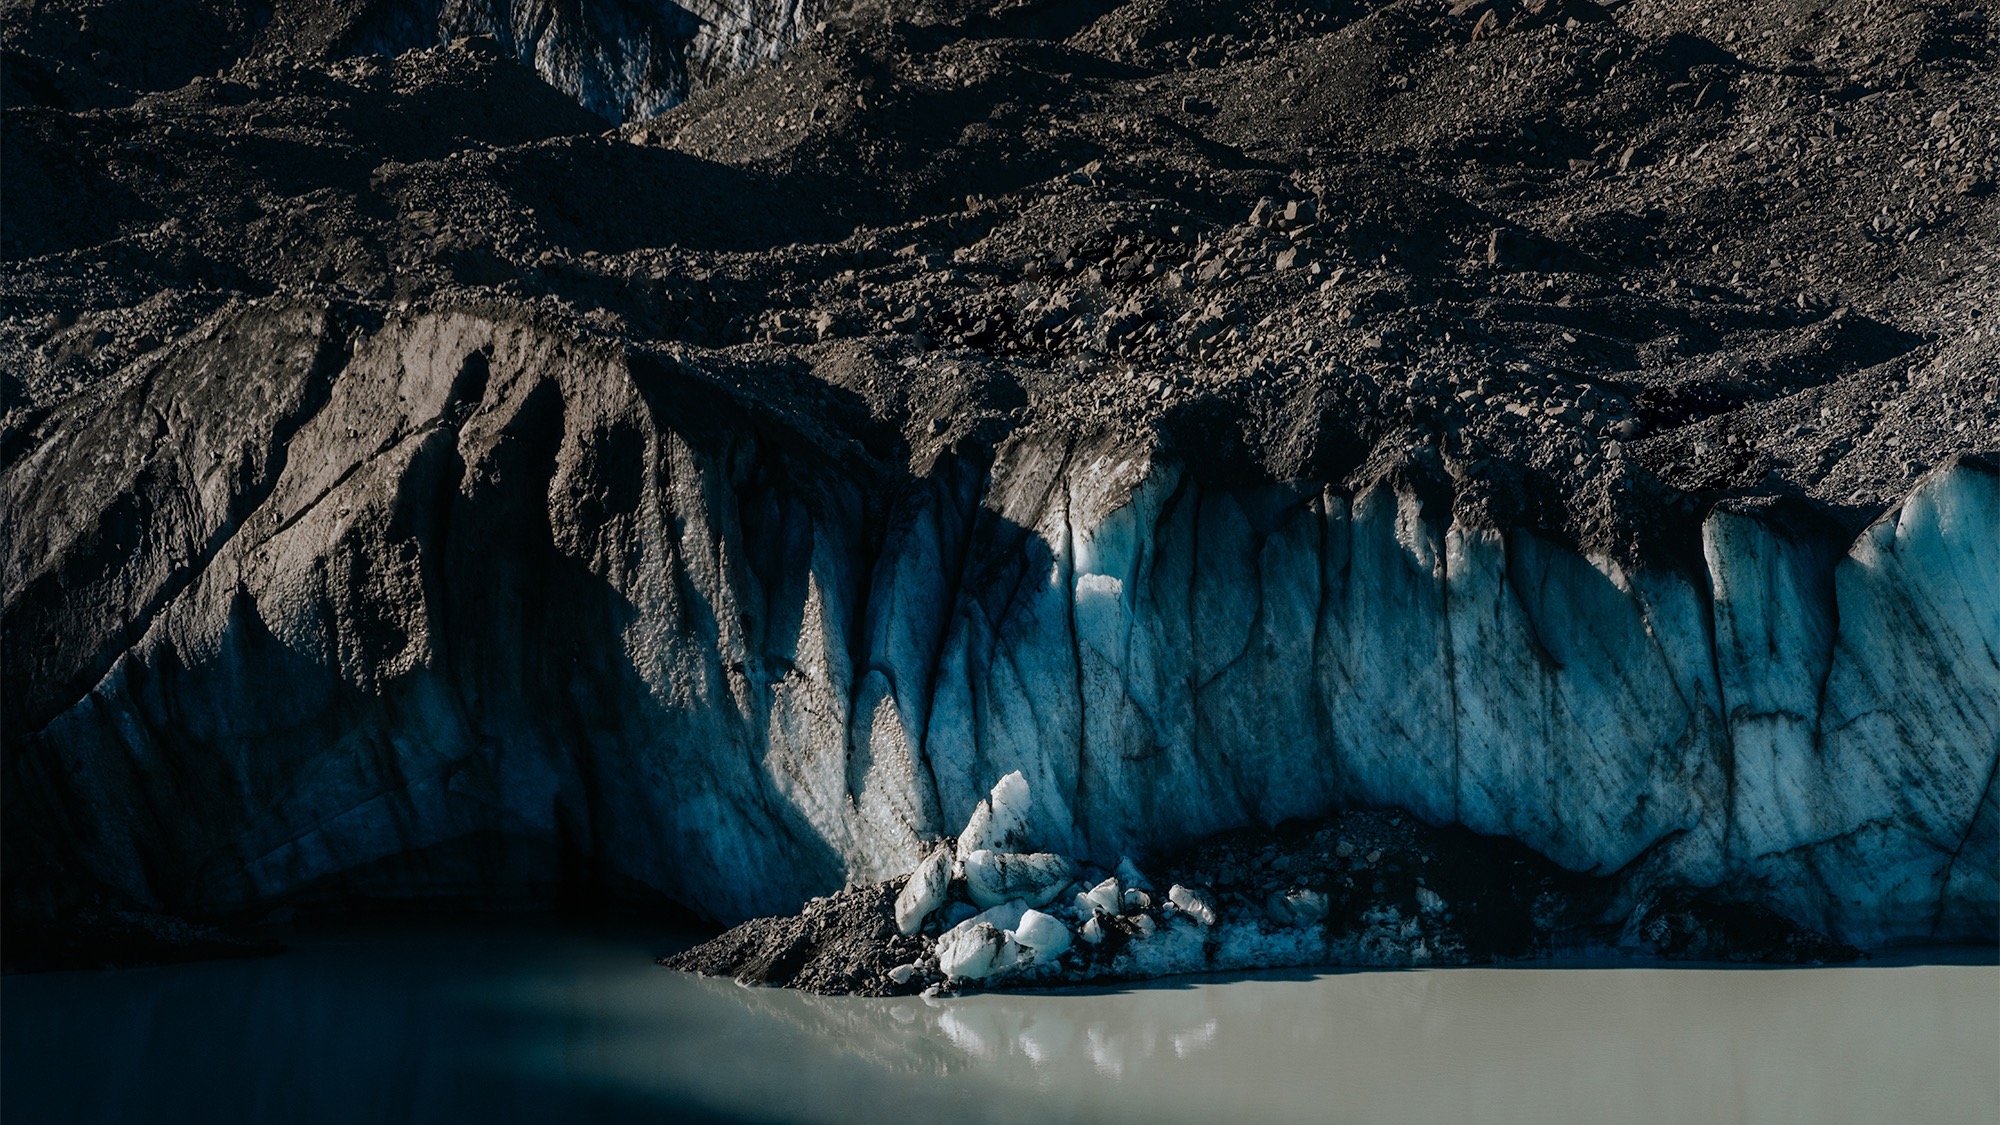
A favourite of mine is to find little flecks of single point lighting tucked into a dark scene. Or the opposite, find something dark in the middle of a bright scene. Contrast. It happens a lot at the tele end of the spectrum, and is a great starting point when exploring a scene.
Is that a mountain you spy off in the distance? Treat yourself to a wide photo of it, but then dig deeper. Are there any interesting features? A peak showing through a cloud? An interesting ice formation? Zoom, zoom, zoom!
Remember though, try to keep a shutter speed faster than your focal length (as a rule of thumb, I try to stick to around 1.5x my focal length) to avoid any blur in your images.

Ignore the obvious.
It’s really, really easy to snap a 35mm photo of a glacier and call it a day. You’ve got all the key bits, right? The glacial wall, some icebergs in the foreground, even a bit of the moraine. Pack it up, we’re out!
No you’re not! Break the scene down. All of those things I just listed - split them apart and treat them as an individual scene within the larger one you’ve just captured. What have you found? Are there patterns in the ice? An interesting texture in the rocks?

Keep breaking the scene down until you can’t go any further. It’s a tricky principal to apply when going wide, but works incredibly well when going in the other direction.
Zoom, enhance! CSI have been doing it for years, now you can too.
Forget it, we’re going wide!
So we’ve got the main point of the article, right? Zoom in, find texture and details, repeat.
Great. Now let’s go the other direction, and use our telephoto lens to shoot something wide - thereby discounting everything I’ve said so far.

When zoomed right in, pan around your scene and take a handful of images (or in the case of the image below - 30 images), and stitch them all together to create a super high resolution wide angle image.

Each of these images has enough resolution in them to be printed at 300dpi to roughly the size of a bus. There’s no limit (aside from the processing power of your computer) to how far you can take this. Take a look at Gigapan to see this process in the extreme.
Challenge yourself
There we have it, my case for adding a telephoto lens to your bag for landscape photography. When you challenge yourself to really hone in on the details of what makes a scene, you’ll be amazed what you can produce.


