

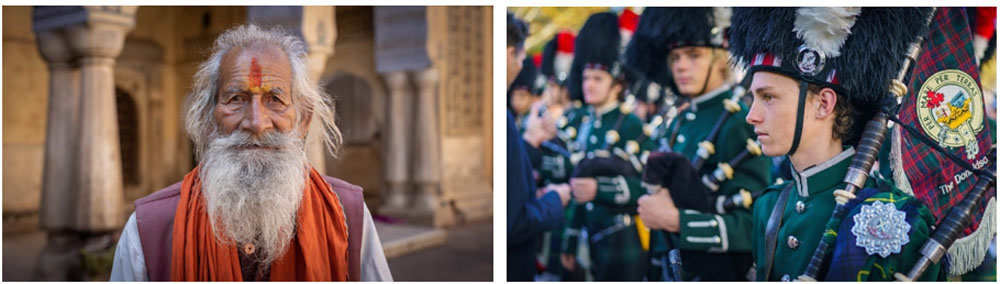
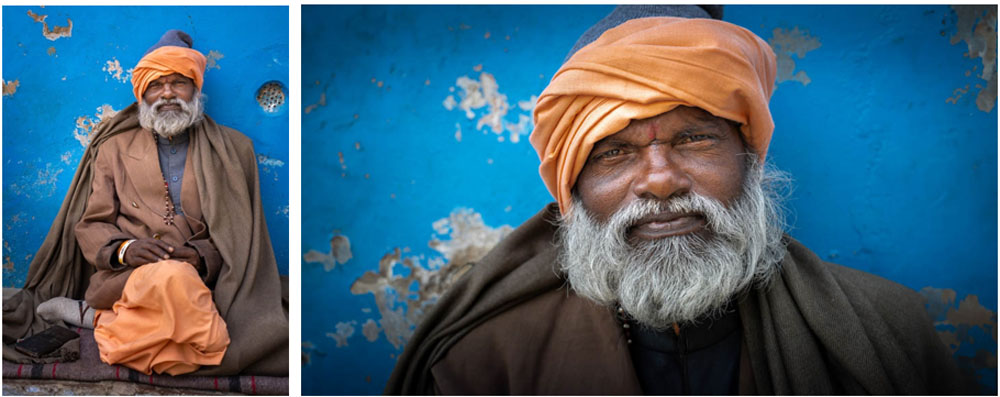
The craft of representing a person in a single still image or ‘portrait’ is a skill that can be mastered by most photographers. The photographic portrait (just like the painted portrait that influenced the genre) is not a candid or captured moment of the active person, but a crafted image to reveal character. The person being photographed for a portrait should be made aware of the camera’s presence, even if they are not necessarily looking at the camera when the photograph is made. This requires the photographer to connect, and communicate with the subject, if the resulting images are to be considered portraits. Portraits, therefore, should be seen as a collaborative effort on the part of the photographer and subject. A good photographic portrait is one where the subject no longer appears as a stranger.
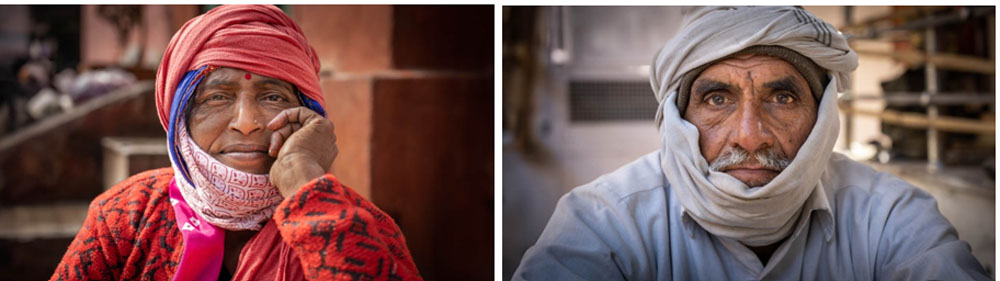
The physical surroundings and conditions encountered on location, whilst making a portrait image, offer enormous potential to extend or enhance the communication. Just as facial expression, body posture and dress are important factors, the environment or location plays a major role in revealing the identity of the individual. The portrait may also be the central or key image of a collection of images that together form a photo-essay, narrative or social documentary.
Composition
Vantage Point
The relationship and connection between the foreground and background becomes a major design consideration for an environmental portrait. The horizon line (a key element in the design of an image) can be quickly raised or lowered in the composition by simply raising or lowering your height in relation to the subject being photographed. The horizon line can be removed from the frame completely if the camera is either raised or lowered enough.
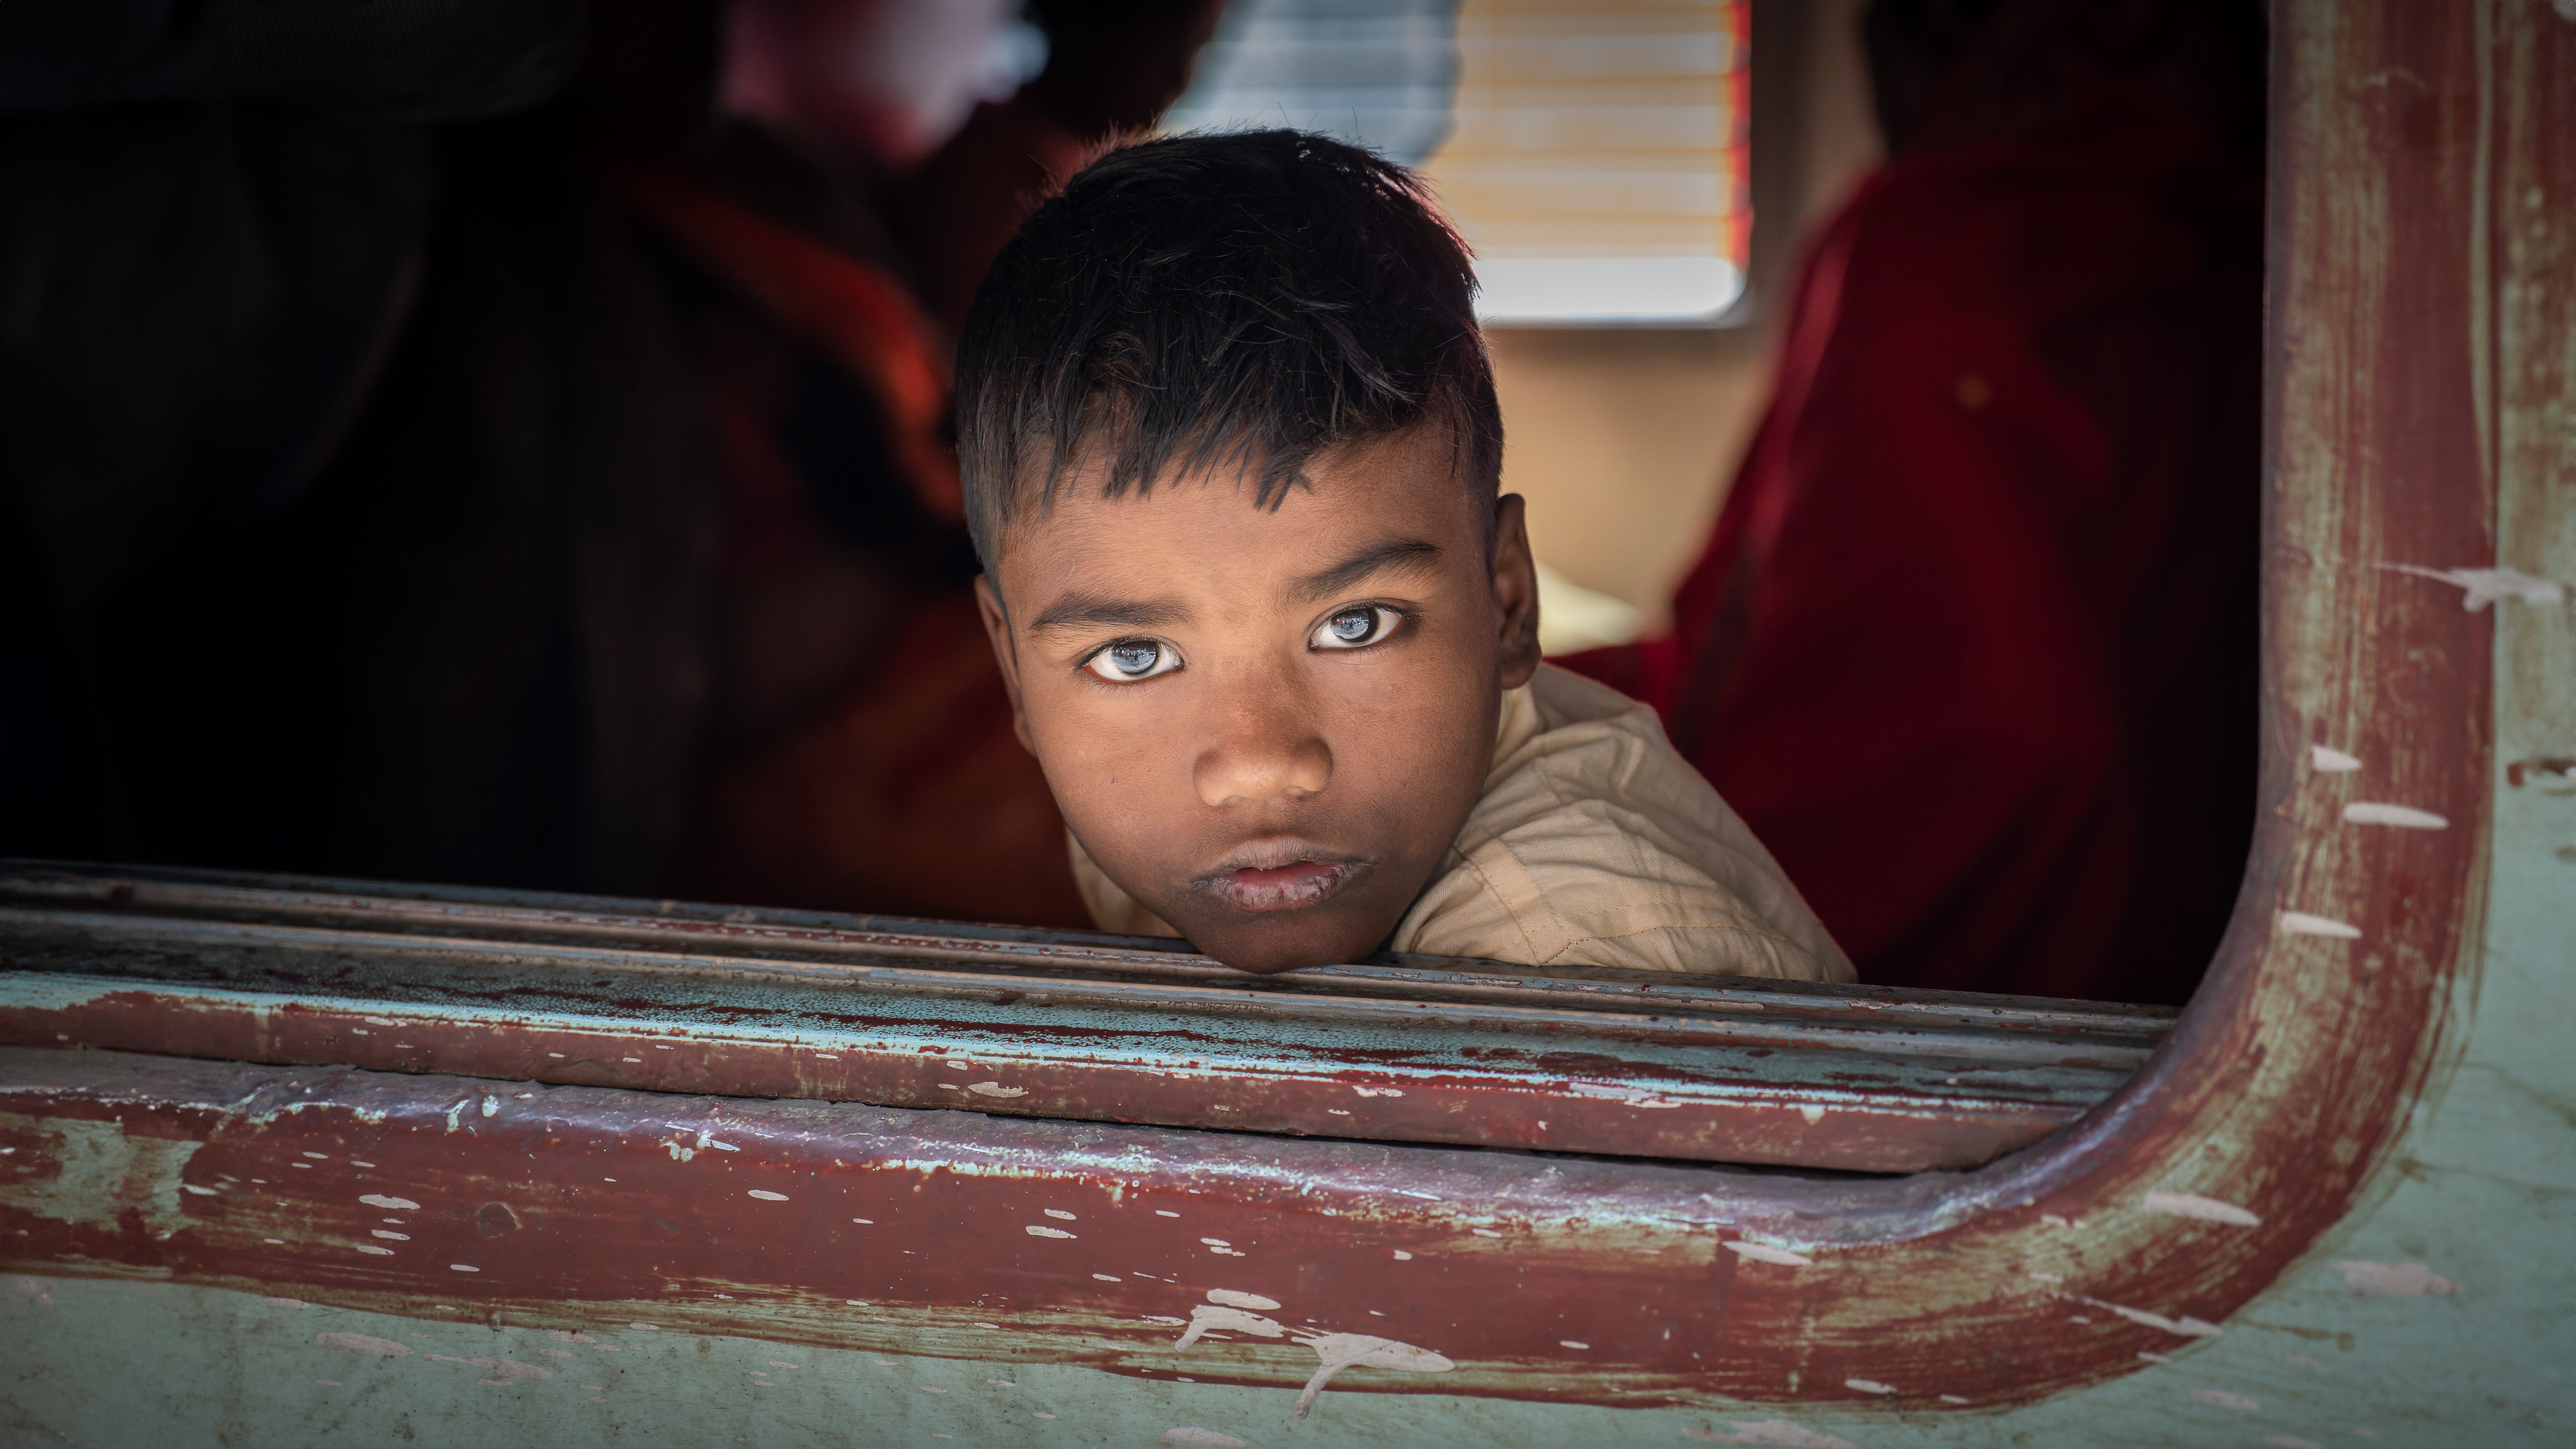
As well as lowering the horizon line, adopting an angle of view that is slightly lower than your subject, can have the effect of elevating the subject’s importance as it can make the subject appear ‘heroic’ or ‘statuesque’. Alternatively, when the camera angle is raised, and the subject’s eyes rise to meet the camera lens, the whites of the eyes (sclera) can increase and make the subject’s gaze seem more powerful.
Framing and Aspect Ratio
The choice of either vertical or horizontal framing, and the placement of the subject within the frame (centred or off-centre) will affect the quantity of environmental information that can be viewed in the resulting image. A centrally placed subject close to the camera will marginalize the environmental information. Using the horizontal or ‘landscape’ format when composing the portrait image allows the photographer to more easily include background information that may, in turn, help to build a narrative or place the subject in context with their surroundings. Using a wider 16:9 aspect ratio (rather than default 3:2 aspect ratio of the sensor) will allow the photographer to fill the screen for the viewers who are viewing the images on TVs or computer monitors, rather than mobile hand-held devices that are typically held in the vertical orientation. Cropping an image during post-production editing to 1.91:1 (an aspect ratio called ‘Flat) or 2.35:1 (an aspect ratio called ‘Scope’) can be used to give a cinematic feel to your images (hence the name ‘CinemaScope’). The Sony Alpha cameras can assist in the composition of these ‘widescreen’ images by using either the ‘Shooting > Aspect Ratio > 16:9’ menu option or the ‘Shooting > Marker Display > Aspect Marker’ options. Using these tools may help you avoid overly tight compositions that do not lend themselves to cropping to a wider aspect ratio in post-production editing.
Light
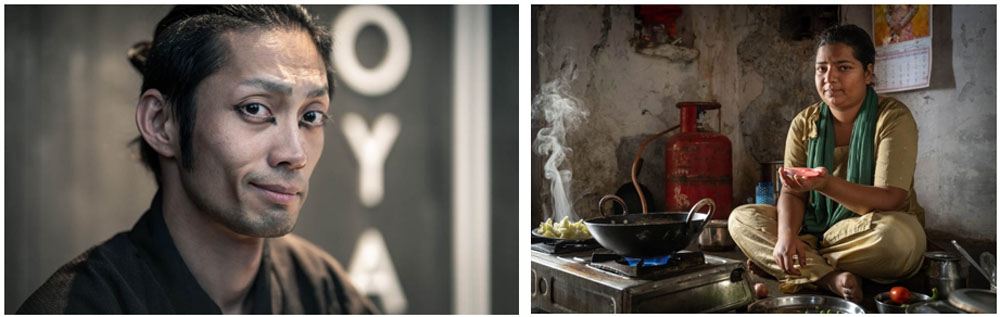
I prefer to use only the natural ambient light (avoiding the use of flash entirely) to retain the ‘authentic’ mood of the location. I am happy to work with high ISO values up to 12,800 and use modern AI denoising tools in post-production editing rather than having to resort to using flash when the ambient light is very dim. I used to use Fill-Flash on sunny days to lighten overly dark shadows when my subjects were backlit. I now, without the use of flash, mostly expose for the bright highlights (underexposing the backlit subject slightly) and then raise the brightness of the shadows in the post-production editing software. This results in a more ‘natural look’ for my images.
By moving my own position in relation to the subject I find that I can work the direction of the light, and I will sometimes ask the subject to turn or move to a position where the light can be used to the best effect. One of my favourite techniques is to move the subject to an open doorway where there is cover directly above them. This forces the direction of light to come from a much lower angle-of-view, helping to model the face and preventing eyes appearing overly dark, that might otherwise result from overhead lighting.

Pose
I personally strive to have my subjects appear natural, comfortable and ‘unposed’. It may take several minutes before a subject can relax in front of a camera, and the photographer may need to reassure the subject or direct the subject to drop the cheesy smile and/or ‘social media pose’ they may feel is expected of them. Directing them to look away from the camera for one or two shots may help them relax, as people often don’t feel the need to smile when looking away from the camera lens.
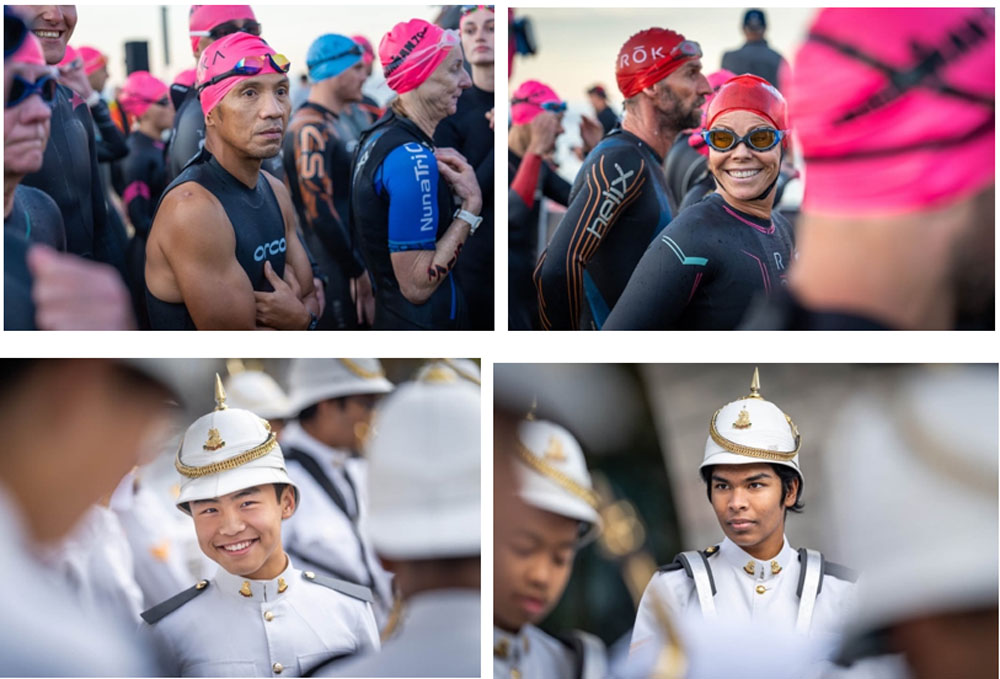
Composing two or more people
Composing two or more people within the frame can take some practice. If done well, your subjects will now relate to each other as well as with their environment. The physical space between people can be very significant in the way we read a portrait. For a close-up portrait of two people the space between them can become an uncomfortable design element. Careful choice of vantage point or placement of the subjects is often required to achieve a tight composition, making optimum use of the space within the frame.
A situation that is frequently encountered, is where two people sit or stand side-by-side, shoulder-to-shoulder. If approached face-on, the space between the two people can seem great. This can be overcome by shooting off to one side or staggering the individuals at different distances from the camera (be prepared to stop the aperture down to F8 or F11 when you do this).
Depth of field
Many cameras provide a ‘Portrait Mode’. When this program mode is used, a combination of shutter speed and aperture is selected to give a visual effect deemed suitable for portrait photography by the camera manufacturers. The visual effect aimed for, is one where the background is rendered out of focus, i.e. shallow depth of field. This effect allows the subject to ‘stand out’ from the background, reducing background information to a blur and potentially removing any background distractions. This effect may be the desired outcome for some portrait images but, in many instances, increasing the depth of field can provide more information about the physical surroundings and environment, which may help to build a narrative. The photographer intending to shoot portraits should consider using the ‘Aperture priority’ or ‘Manual’ exposure modes, so that maximum control over depth of field is always possible. When capturing a head-and-shoulders portrait, an aperture of F1.4 or F1.8 can result in depth of field that is too shallow for some portraits, this is especially noticeable when your subject has a beard, as the eyes and the beard cannot both be in sharp focus at the same time. An F4 maximum aperture is often ‘wide enough’ when working at very close range with a short telephoto lens, although the F1.4 and 1.8 apertures can be useful for isolating the subject when capturing three-quarter and full-length portraits.
Creating Depth
When photographers strive to create a sense of depth in their photographic images, especially when using wide-angle lenses, they will often make use of ‘leading lines’ to help draw the viewers eyes through the image, from the foreground towards the focal point of the image. When working with longer focal length lenses (where the depth of field is often very shallow) the photographer is still able to build depth, while still isolating the primary subject from other subjects in the frame. I will achieve this outcome by adding out-of-focus subjects in the foreground, as well as the background bokeh to help create this sense of depth. I am effectively using foreground obstacles as constructive design elements, rather than obstacles that need to be avoided.
Portrait lenses and working distance
The ‘ideal’ portrait lens is considered, by many manufacturers and pro photographers, to be a medium telephoto lens such as an 85mm lens (or full frame equivalent). This type of lens provides a visual perspective that does not distort the human face when creating head and shoulder portraits. The problem of distortion, however, is not encountered with shorter focal length lenses if the photographer is not working as close to the subject. To record environmental portraits with a telephoto lens longer than 85mm would require the photographer to move further away from the subject and possibly lose their connection with the subject. Standard and wide-angle lenses are also suitable for environmental portraiture. In the example above I show an advantage to working with a lens that includes both standard and short telephoto focal lengths, to capture a range of images that can include full-length shots plus tighter, and more intimate, portraits. When working with a standard focal length prime lens you just need to zoom with your feet.
Revealing character
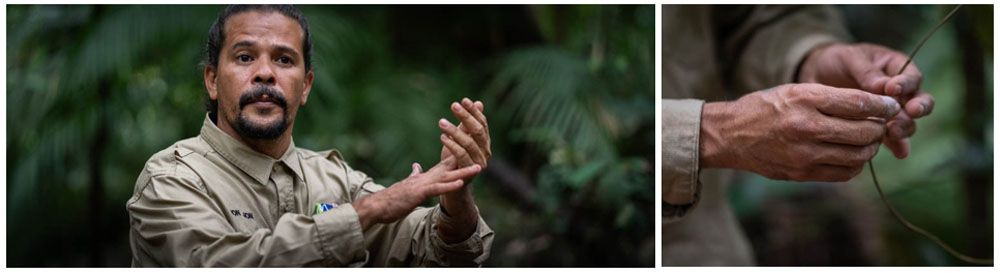
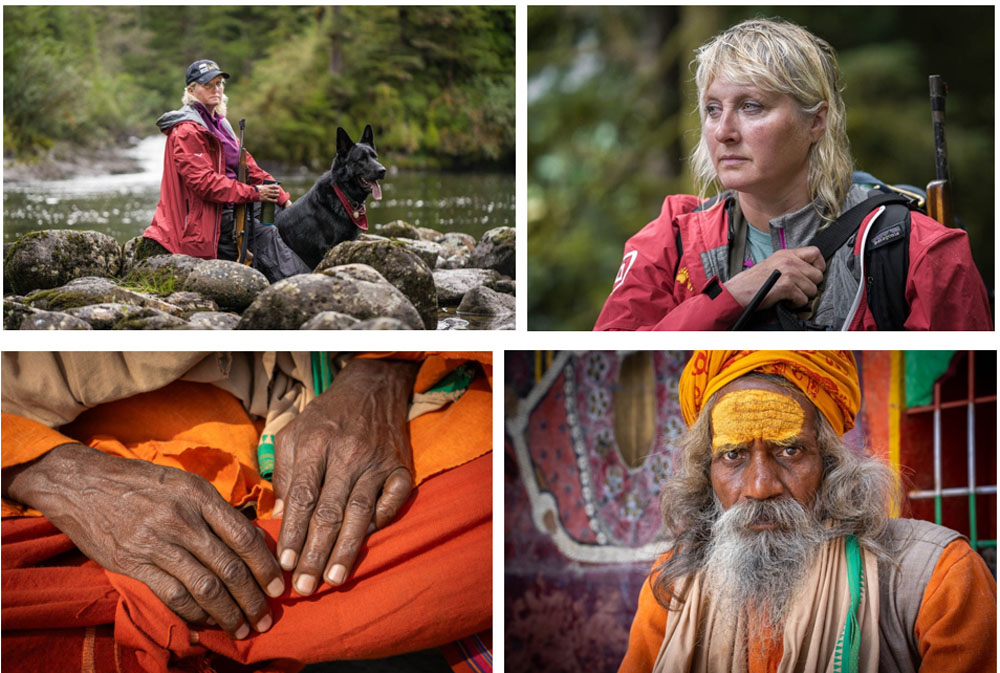
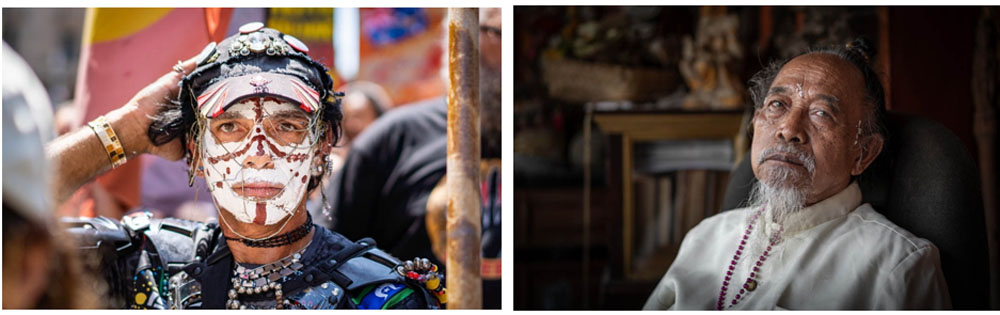
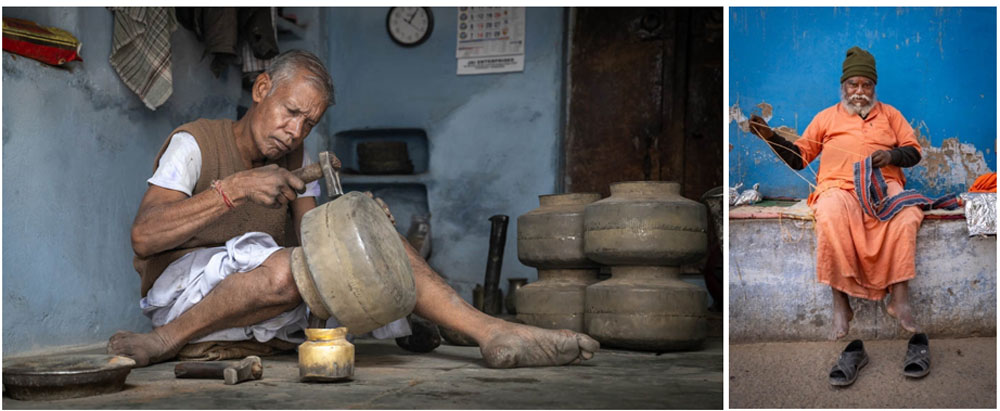
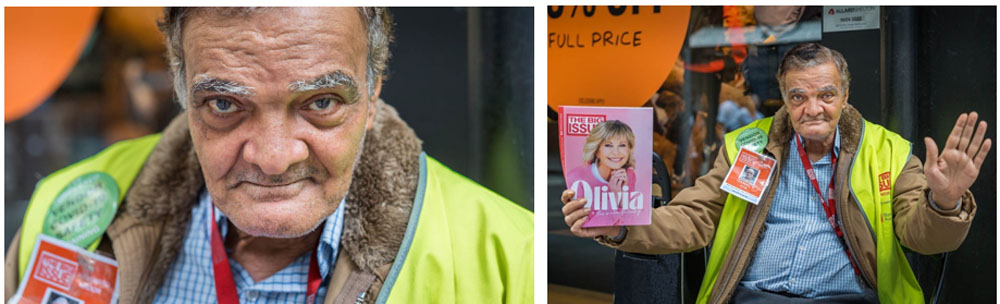
Significant and informative details can be included within the frame with the subject or included as additional images in a photographic narrative or photo-essay. These details may naturally occur in the environment or be introduced for the specific purpose of strengthening the communication. Connections may be made through the ‘tools of the trade’ associated with the individual’s occupation.
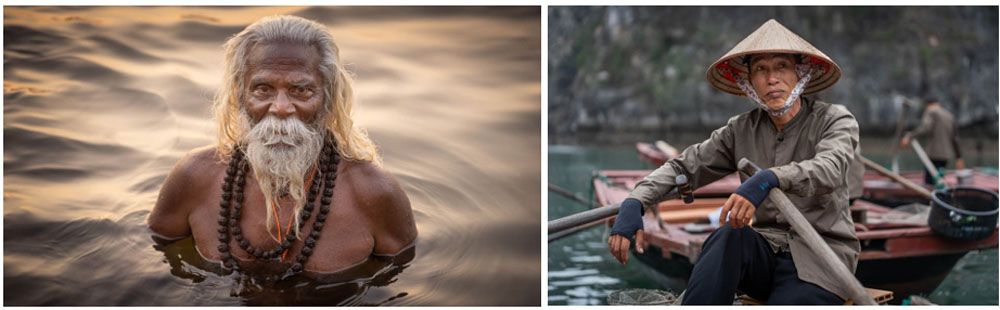
The objects or subject matter chosen may have symbolic rather than direct connection to the subject. In the images of the woman that appear above, the inclusion of the rifle, coffee mug and dog are all key subjects that reveal a lot about this Alaskan guide’s day-to-day occupation. An additional photograph of the hands of the Indian Sadhu also helps to reveal an aspect about the character of this holy man.

Connecting with new people
The shift from receptive observer to active participant can sometimes be awkward and difficult for both the potential subject and the photographer. These feelings of awkwardness, embarrassment or even hostility may arise out of the subject’s confusion or misinterpretation over the intent or motive behind the photographer’s actions. The photographer’s awkwardness, or reticence to connect, often comes from the fear of rejection.
The initial connection with the subject is crucial for a successful portrait. If the photographer is taking images at an event or activity, the photographer must be very aware when someone within the frame makes eye-contact with the camera. At this decisive moment the posture and facial expression usually remain unchanged from where the subject’s attention was previously engaged. The photographer should be able to capture a single frame at this moment before lowering the camera. There is no time for re-focusing, re-framing and adjusting exposure. The camera should be lowered and a friendly and open response offered by the photographer. If the photographer continues to observe the subject after having been noticed the subject’s sense of privacy can be invaded and the photographer’s chance for an amicable contact can be lost. Most people will gladly cooperate if a friendly connection has first been established.
Contact
The first verbal connection with the subject should be considered carefully. Asking people for their permission to photograph them requires a considered response on the subject’s behalf (‘What are they selling?’ and ‘Who will see the picture?’ etc.). Unsure of the implications of consenting to be photographed many people will refuse their permission. Once refused it is not always possible to persuade someone that their acceptance to be photographed would have no further implications, i.e. they would not be required to purchase the photograph, give consent for publication, etc.
Familiarity
Many photographers will arrange a preliminary visit to a location if there is time available. This will allow individuals present at the location to get used to the photographer’s presence and feel comfortable being photographed. This is especially useful at small or enclosed events, as it may be difficult for the photographer to work unnoticed. If introductions haven’t first been made the photographer may cause some disruption at the event or activity. Successful environmental portraits are often dependent on the initial interactions the photographer has with the potential subject.
Interaction
Putting a subject at ease in front of the camera is dependent on two main factors:
- The subject is clear about the photographer’s motive.
- The subject sees value in the photographs being made.
Motive
Many people view an unknown photographer with curiosity or suspicion. Who is the photographer and why are they taking photographs? It is essential that the photographer learns to have empathy with the people he/she intends to photograph. A brief explanation is therefore necessary to help people understand that the photographer’s intentions are harmless. If the photographer and subject share no common verbal language then smiles, gestures and body language can go a long way to help the subject feel comfortable. Showing images on the back of the camera can also help the subject to interact with you in a positive way.
Value
Some people may see the activity or job that they are doing as uninteresting or mundane. They may view their physical appearance as non-photogenic. The photographer needs to explain to the subject what it is that he/she finds interesting or of value and why. If the activity the subject has been engaged in appears difficult or demanding and requires skill, patience or physical effort, the photographer should put this view forward. The photographer should continue to ask questions whilst photographing so that the subject is reassured that the interest is genuine. Smiling, pointing and using the universal ‘thumbs-up’ gesture can also let a subject know that you value their activity.
Directing the subject
The photographer should display an air of confidence and friendliness whilst directing subjects. Subjects will feel more comfortable if the photographer clearly indicates what is expected of them. There can be a tendency for inexperienced photographers to rush a portrait when dealing with complete strangers. The photographer may feel embarrassed or feel that the subject is being inconvenienced by being asked to pose. Because a subject may hear the camera shutter and presume that one image is all that is required I often don’t stop to review the first image, but immediately direct them towards the second image that I intend to make.
Passive subject
A photographer should consider asking a subject to pause from the activity that they are engaged in. The photographer can then remain receptive to the potential photographic opportunities by keeping the conversation focused on the subject and not oneself.
Expression and posture: Often a subject will need reminding that a smile may not be necessary. Subjects may need guidance on how to sit or stand, what they should do with their hands and where to look. It may be a simple case of just reminding them how they were standing or sitting when you first observed them. I am constantly surprised how often this can be communicated by gestures and body language alone.
Shooting decisively: The longer a photographer pauses to take the picture the potential for the subject to feel uncomfortable about their expression and posture increases. To freeze human expression is essentially an unnatural act. Exposure, framing and focus should all be considered before raising the camera to the eye.
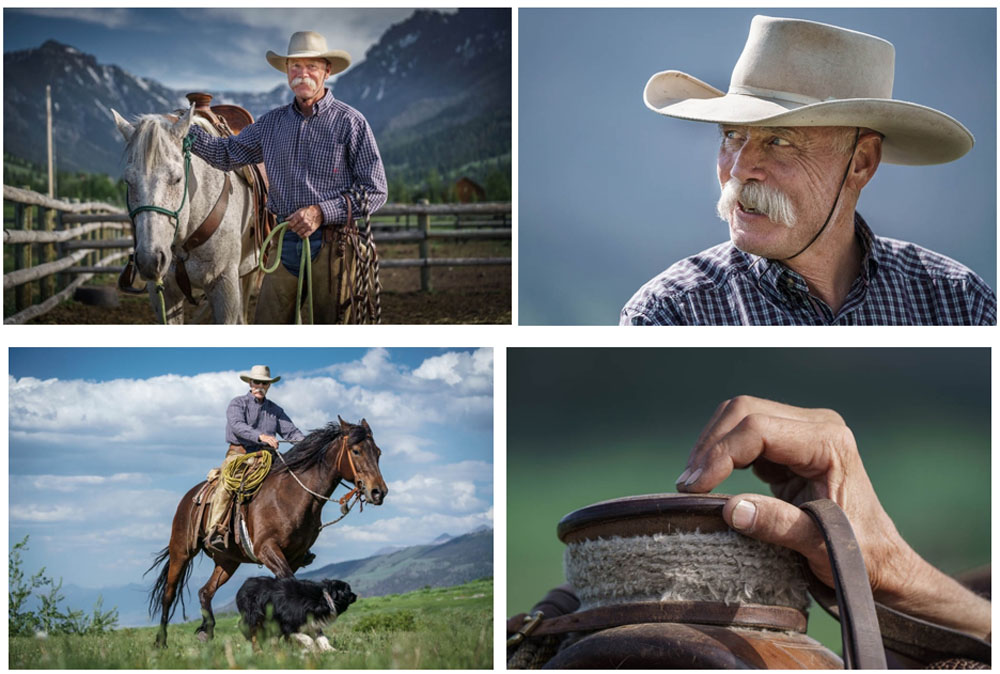
Character study
Portraits often stand alone in editorial work but can also form part of a larger body of work. A series of portraits may be taken around a single character, or characters, connected by profession, common interest or theme. With additional images the photographer can vary the content and the style in which the subject is photographed to help further define their character within the study. The photographer may choose to include detail shots such as hands or clothing to increase the quality of information to the viewer. The study may also include images which focus more on the individual (such as a straight head and shoulders portrait) or the environment to establish a ‘sense-of-place’.
The images above show a diversity of approaches to present the character of a single individual. The images are of Randy who is a horse wrangler in Wyoming. The images all work together to reveal more about Randy than one single image can ever hope to.
Mark Galer is a Sony Digital Imaging Ambassador and provides an Alpha support channel at Patreon.com/markgaler
https://www.patreon.com/c/markgaler